Home Blog Page 31

ICAR Developed Crop Varieties Tolerant To Climate Change

0
ICAR developed Crop Varieties Tolerant to Climate Change
ICAR developed Crop Varieties Tolerant to Climate Change.

According to the information given by Shri Narendra Singh Tomar, the Union Minister for Agriculture and Farmers Welfare, in his written reply in the Rajya Sabha, resistant varieties of various crops to withstand climatic stress have been developed by ICAR. This measure has been taken to enhance the production of food grains even during the situations of climatic changes. In total 2122 cultivars have been released from 2014 till the date of which 1752 are climate-resilient varieties, 400 are abiotic stress-resistant cultivars and 1352 are biotic stress-resistant cultivars. For usage on a large scale in various agricultural communities 68 site-specific climate-resilient technologies were developed and popularised.

Over the past eight years, agricultural contingency plans have been developed for 650 districts and government officials have been made ready to stay prepared through 57 state-level interface meetings. These plans are available online to help policymakers in making decisions against late monsoons and other extreme weather events. Demonstration of Climate resilient technologies is done in rural fields in 151 clusters covering 446 villages based on vulnerability assessment. The negative effects of climate change on agricultural production have been effectively addressed through technological interventions. During the last 5 years, the production of food in the country has continuously increased as follows:

Year 2017-2018 2018-2019 2019-20 2020-21 2021-22
Production of foodgrains (in million tonnes) 285.01 285.21 297.50 310.74 315.72


Development of varieties resistant to climate change is a boon for the agricultural workforce. 46.46 % of workforce is engaged in the Agriculture Sector in All India basis as per the 2020-21 Periodic Labour Force Survey (PLFS), done by Ministry of Statistics & Programme Implementation (MoSPI). Of this Chhattisgarh has highest (66.02%) and New Delhi has lowest (0.25%).

The Indian Council Of Agricultural Research (ICAR) Conducts Research Regularly To Develop Climate-Resilient Strategies For The Sustainability Of Aquaculture And Fisheries

0
The Indian Council of Agricultural Research (ICAR) conducts research regularly to develop climate-resilient strategies for the sustainability of aquaculture and fisheries

Climate change impact studies conducted by ICAR institutes under National Innovation in Climate Resilient Agriculture (NICRA) include vulnerability assessment of wetland fisheries in various states. Climate campaigns and awareness programs are being implemented to increase fishermen’s preparedness and adaptive capacity to climate change.

Fisheries research institutes backed by the Indian Council of Agricultural Research (ICAR), Government of India, regularly conduct research to understand the effects of climate change in regard to making climate-resilient strategies that will help fisheries and aquaculture sustain. Climate change impact studies conducted by ICAR institutes under ‘National Innovation in Climate Resilient Agriculture (NICRA) consist of- 

  • Evaluation of the risk factor for Wetland fisheries in Assam, West Bengal, Bihar, Odisha and Kerala.
  • Analysis of climate trends in major river basins of India
  • Influence on a range of fish distribution, composition of their catch and yields, etc. 

In marine fisheries, the NICRA project is conducting studies on models on climate change, projection of fish catch and mariculture production in the presence of climate change scenarios, assessment of risk and vulnerability for marine fisheries, wetland mapping, carbon footprint, blue carbon potential, ocean acidification, the effect of climate change on the catch and cultured species, and adaptive management in response to climate change. 

To spread awareness of Climate change, campaigns and awareness programs are held in the states of Odisha, Assam, West Bengal and Kerala. This will help in increasing the adaptiveness and preparation of fishermen for climate change.


Rise In Rabi Cropping Area After The Government’s Support For Agriculture

0
Rise In Rabi Cropping Area After The Government’s Support For Agriculture

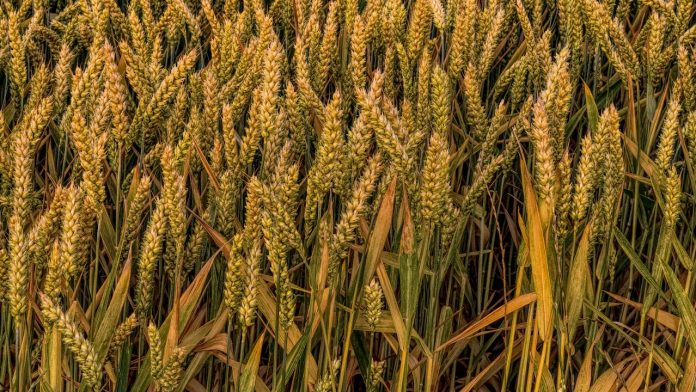
The area under rabi crops has increased to 526.27 lakh hectares from 457.80 lakh hectares (which is 15% more than 2021-22 i.e. difference of 68.47 lakh hectares) according to the recent data released by the Ministry of Agriculture and Farmers Welfare. Among all these crops, the wheat crop tops the list. 

Crop and its area data of Increase

  • The wheat area has increased to 255.76 lakh ha from 203.92 lakh ha i.e. 51.85 lakhs is the net increase. 
  • The oilseeds cultivation area raised to 95.19 from 87.65lakh ha, which is 7.55lakh ha more than the year 2021-22. Among this 7.55 lakh ha, rapeseed and mustard together occupy 7.17 lakh hectares. (Due to the Special Mustard Mission for the last 2 years risen rapeseed and mustard by 17%  between 2019-20 and 2021-22). 
  • Pulses area surged to 127.07 lakh ha from 123.77 lakh ha (a difference of 3.30 lakh ha from the previous year). Gram has shown a greater increase which is 2.14 lakh ha out of 3.30 lakh ha. up
  • There is a remarkable growth of 4.34 lakh hectares area under cultivation of coarse cum Nutri-cereals. Recently it is 36.39 lakh ha in comparison to the previous year’s area of 32.05 lakh ha. 

Red Spider Mite – An Important Pest Of Tomato Crop

0
Red Spider Mite – An Important Pest of Tomato Crop

Tomato is an important vegetable crop in India, both for domestic consumption and for export. India is the world’s second-largest producer of tomatoes, after China, with a production of over 20.34 million metric tonnes in the year 2022. However, they are vulnerable to various pests that can cause significant crop loss. Among them, red spider mites (Tetranychus spp) are a common pest that infest tomato plants. Nymph and adult stage of the pest affect the crop. Red spider mites can reproduce rapidly, and their populations can quickly grow out of control if left unchecked. Regular monitoring and implementing proper management measures can help to control red spider mites.  

How does it spread? 

Wind currents, irrigation water and mechanically through field workers or tools are the factors responsible for spread of mites over short distances. Presence of host plants such as beans, citrus cotton, tobacco, brinjal, potato, cotton and weeds can also spread the mite infestation.  

Red Mites in Tomato Damage Symptoms:

White speckles on upper leaf surface
  • The mites feed on the undersides of the leaves, with the help of its piercing and sucking mouth part, thus sucking out the sap and causing the leaves to turn yellow. 
  • As the infestation progresses, fine webbing can be noticed on under surface of leaves and later the whole leaves. Sometimes, this webbing can cover the entire plant.  
  • Their feeding pattern can cause ‘stippling’ or tiny white to yellow speckles on the upper leaf surface. 
  • On severe infestation, leaves become brittle and bronzy i.e., reddish brown appearance. 
  • Presence of eggs on the under surface of the leaves. 
  • Affected leaves may dry and drop prematurely. 
  • Causes stunted growth of plants and affects flower and fruit formation.  

Preventive measures: 

  • Monitor the plants regularly for early signs of infestation, such as yellowing leaves and webbing. 
  • Avoid dusty conditions in the field by following regular irrigation practices. 
  • Avoid using contaminated tools and equipments. 
  • Avoid overcrowding your plants, which can create an environment that is favorable for red spider mite infestations. 
  • Introduce beneficial insects, such as ladybugs and greenlace wings, that feed on red spider mites. 
  • Remove and destroy any infected plant material from the field to prevent the spread of mites to other plants. 
  • Avoid growing tomato crops in close proximity with its alternate hosts. 
  • Use a high-pressure water spray to knock off mites from your plants and disrupt their life cycle.  
  • Keep the field clean and free of debris to eliminate hiding places for mites.  
  • Spray neem oil extracts at 1 –2 ml/lit of water at an interval of 15 days.  

Control Measures for Red Spider Mites in Tomato: 

Product name  Technical content  Dosage  
Biological Management 
Royal Clear Mite  100% derived from plant extracts  2 ml/lit water 
R Mite Bio Acaricide  Plant extracts  1 – 2 ml/ lit water 
PerfoMite  Phyto-extracts – 30%, Enzyme extracts – 5%, Chitin Dissolvers  2 ml / 1 lit water 
Chemical Management 
Oberon Insecticide  Spiromesifen 22.9% SC   0.3 ml /lit water 
Abacin Insecticide  Abamectin 1.9% EC  0.7 ml /lit water 
Maiden Insecticide  Hexythiazox 5.45% EC  1 ml /lit water 
Intrepid Insecticide  Chlorfenapyr 10% SC  2 ml/lit water 
Danitol Insecticide  Fenpropathrin 10% EC  1.5 ml/lit water 
Movento Energy  Spirotetramat 11.01% + Imidacloprid 11.01% SC  0.5 – 1 ml/lit water 
Omite Insecticide  Propargite 57% EC  2 ml/lit water 
Pyromite Fenpyroximate 5% EC  1.5 – 3 ml/lit water 


Indigenous Technical Knowledge (ITK) practices you can follow to control Red Spider Mite in tomato: 

  • Spraying cow urine diluted with water (1:20) on tomato plants can help control red spider mites. 
  • A mixture of garlic and chilli with water (1:5) can be used to create an insecticide that can control red spider mites.  
  • Marigold plants are attractive to red spider mites and can be used as a trap crop. Planting marigolds around tomato plants can help control mite populations. 
  • Coriander acts as repellent to control red spider mite. It can be prepared by boiling 200 gm of crushed coriander seeds in 1 liter of water for 10 min. Then, dilute it with 2 liters of water and spray on the infested plant parts early in the morning.  
  • Certain plant extracts such as those from ginger, turmeric, and papaya have been found to have insecticidal properties and can be used to control red spider mites in tomatoes.  
  • Turmeric extract preparation: Soak 20 gm of shredded turmeric rhizome in 200 ml of cow urine. Dilute them with 2 – 3 liters of water and then add 8 – 12 ml of soap. Use this extract for spraying. 
  • Spraying neem oil extracts. 

Learn More About Tomato Farming – Click Here

Trichoderma: An Eco-friendly Bio-Fungal Agent For Sustainable Agriculture

0
Trichoderma: An Eco-friendly Bio-Fungal Agent for Sustainable Agriculture

Trichoderma is a genus of free-living fungi that are commonly found in soil and root ecosystems. They are filamentous fungi that grow rapidly and produce a variety of enzymes and secondary metabolites. Trichoderma is known for its ability to colonize plant roots and provide several benefits to plants, including increased nutrient uptake, improved plant growth and protection against various pathogens. It is versatile in nature and interacts well in all environments including roots, soil and foliage. It interacts with its environment by different mechanisms like antibiosis, mycoparasitism, enzyme secretion and hyphae interactions to suppress plant pathogens.  

Trichoderma viride and Trichoderma harzianum are two Trichoderma fungal species prominent in present agriculture trends. Get a comprehensive overview on beneficial effects of Trichoderma, and how they can be utilized through various methods and products through this article. 

How does Trichoderma benefit soil and plants? 

  • Trichoderma species can suppress the growth of harmful plant pathogens like Fusarium, Rhizoctonia and Pythium by colonizing the plant roots and producing enzymes that break down the pathogen’s cell walls. 
  • Improves plant growth and development by producing plant growth-promoters like auxins, cytokinins and gibberellins, which stimulate root and shoot growth. 
  • It helps plants to tolerate drought stress by producing compounds that enhance the plant’s water-use efficiency. 
  • Improves soil health by enhancing soil structure, increasing soil organic matter and promoting nutrient cycling 
  • They play a crucial role in bioremediation of soil, contaminated with synthetic pesticides and herbicides by degrading them.  
  • Used for production of transgenic plants with increased resistance to fungal infections viz tobacco and potato plants evolved after introduction of endochitinase gene from Trichoderma has increased resistance to Alternaria alternata, A. solani, Botrytis cinerea and Rhizoctonia spp. 
  • Trichoderma can be used in a variety of crops, including vegetables, fruits, cereals and ornamental plants. 
  • It is a safe and eco-friendly option for plant disease management. It is non-toxic and does not have negative impacts on non-target organisms, such as beneficial insects and soil microorganisms. 

Methods of Application: 

  1. Seed treatment: Trichoderma can be applied to seeds as seed treatment to protect from soil-borne pathogens. Seed treatment can be done by coating the seed with a Trichoderma formulation and then shade dried before sowing. This method is especially useful for crops that are susceptible to damping-off disease.  
  2. Seedling treatment: Trichoderma can be applied as root dip to improve root health and control soil borne pathogens that infect the roots. Soak the roots of seedlings in Trichoderma suspension before planting. This method is especially useful for the seedlings that are vulnerable to root rot.  
  3. Soil application: Trichoderma can be mixed with FYM or well decomposed manure and then broadcasted into the field. By doing so, it can colonize organic matter and provide disease suppression along with nutrient cycling benefits when compost is applied in the soil. 
  4. Foliar application: Trichoderma can also be applied to the leaves of plants as a foliar spray. This method is useful for controlling foliar pathogens, such as powdery mildew, and for stimulating plant growth and enhancing the plant’s defense responses. 
  5. Drench application: It can be applied as a soil drench by mixing Trichoderma formulation with water and applied directly to the soil around the plant. This method is useful for controlling soil-borne pathogens that infect the roots or that survive in the soil as spores or mycelium. 

Pathogens widely controlled by Trichoderma spp: 

Trichoderma is effective in controlling a wide range of plant diseases caused by soil-borne pathogens and soil borne nematodes.  It mainly controls disease causing pathogens like Fusarium, Phytopthora, Pythium, Sclerotium, Rhizoctonia and Alternaria, thus controlling root rot, collar rot, stem rot, damping off, wilt, blight/leaf spot, loose smut, kernel bunt and other diseases. 

Best quality Trichoderma products available for sale on BigHaat: 

Product Name  Method of Application  Dosage 
Anshul Tricomax  Foliar spray  3 gm/lit water 
Soil application  2 kg + 100 kg of FYM per acre. Mix them and broadcast 
Sun Bio Derma or Sun Bio Derma- H  Seed treatment  Mix 10 ml of the product in cold jaggery solution. Evenly spread them on the seed surface. 
Seedling treatment  10 ml/lit water 
Soil application   1 lit of product + 50 – 100 kg of well decomposed manure. Mix them and apply 
Drenching  10 ml/lit water 
Fertigation  5 – 10 ml/lit water  
Foliar Spraying  5 ml/lit water 
T.Stanes Bio cure F solid  Seed treatment  5 gm per kg of seed 
Seedling treatment  10 – 20 gm/lit water 
Drip  5 gm/lit water 
Suckers & Bulb treatment  20 gm/lit water 
Soil application  1.2 kg + 500 kg of manure 
Dr.Bacto’s Dermus  Seed treatment  6 ml/kg of seed 
Soil Application  10 ml/lit water 
Foliar Spray  2.5 ml/lit water 
Dr. Bacto’s Herz 4K  Seed treatment  20 gm/kg of seed 
Ecoderma Bio Fungicide  Seed treatment  10 gm/lit water per kg seed 
Seedling dip  10 gm/lit water 
Drenching 
Soil Application  1 kg + 50 – 100 kg of FYM/manure 
Surya Treat Bio Fungicide  Seed treatment  10 gm per kg seeds 
Soil application  15 gm/lit water 
Multiplex Nisarga  Foliar spray  3 gm/lit water 
Soil Application  1 – 2 kg of product + 100 kg of FYM per acre. Mix them and broadcast in the soil. 


NOTE: 

  • Foliar spray can be given in early morning or late evening hours. 
  • Trichoderma, as a biocontrol control agent, is compatible with biofertilizers but is incompatible with chemical fungicides. So, remember not to mix Trichoderma with fungicides. 
  • Seed treated with Trichoderma should only be shade dried. Do not expose it to direct sunlight. 
  • Do not apply Trichoderma when the soil is dry because moisture is essential for its growth and survival. 
  • Check the product’s description to find the specific crop and diseases to be managed and the time of application. 

Conclusion:

Trichoderma is a versatile fungus that can grow in a wide range of environmental conditions, including different soil types, temperatures, and pH levels. It has evolved a range of mechanisms to compete with other microorganisms and provide benefits to plants in different environments. These characteristics make it a valuable tool for sustainable agriculture, as it offers a natural and eco-friendly alternative to synthetic fungicides.  

Humic Acid A Boon For Sustainable Agriculture 

0
Humic Acid a Boon for Sustainable Agriculture

Humic acid is a naturally occurring compound that is formed by the decomposition of dead plants and animal matter over time.  It is characterized by its dark color and high molecular weight. Humic acid plays a crucial role in enhancing nutrient availability and uptake by plants. In the absence of humic acid, nutrients applied through fertilizers may become locked up in the soil or washed away, leading to nutrient deficiencies in plants. It is safe for the environment and does not harm beneficial microorganisms in the soil.  

In this article, we will discuss how humic acid is a boon for sustainable agriculture and why farmers should consider using it in their farming practices.   

What is Humus? 

Humus is a brown or dark brown complex organic component of soil, formed by decomposition of plant and animal matter. The formation of humus is a slow process that takes years depending on the organic matter, soil conditions and microbial activity. Humus accounts for about 60 – 80% of soil organic content.  

Humic substances are components of humus which includes humic acid, fulvic acid and humin that vary depending upon molecular weight, colour and solubility in water at different pH levels. ` 

  • Humic acid is a dark brown humic substance with higher molecular weight than fulvic acid and is soluble in water at higher soil pH values. These complex mixtures of organic compounds act as natural chelating agents.  
  • Fulvic acid is a humic substance consisting of low molecular weight molecules that are typically yellow to light brown in color. It is soluble in both acidic and alkaline conditions and helps to transport nutrients into plant cells and promote root development. 
  • Humin is a black complex organic complex that is not soluble in both alkali and acid. It has high molecular weight and is highly resistant to decomposition. They function to improve soil structure and improve cation exchange capacity of soil. 

Humic acid and fulvic acids are the humic substances that are commercially used for soil and plant application in various forms like granules or liquid.  

Benefits of Humic acid on Soil Physical, Chemical and Biological Health 

Soil Physical Health: 

  • Improve soil structure by increasing soil aggregation, which are groups of soil particles held together by organic matter. This helps to create larger pores in the soil which improves water infiltration, aeration and root growth. 
  • Improves the water holding capacity (up to 7 times) of soil and thus helps to reduce the frequency and severity of droughts, particularly in sandy or low-organic matter soils. 
  • Reduces soil compaction which can improve soil aeration, water infiltration, and root growth. 
  • Reduces the risk of soil erosion by improving soil structure and increasing water-holding capacity. 
  • Makes soil more friable and improves soil tilth. 

Soil Chemical Health: 

  • Improves nutrient availability by converting the nutrient elements into available forms thus making it accessible for plant uptake. It acts as a chelating agent, which means it can bind to and transport nutrients to plant roots. 
  • Reduces nutrient leaching by increasing the Cation Exchange Capacity (CEC) of soil. 
  • Enhances soil pH buffering capacity 
  • Binds with heavy metals and other toxic substances, reducing their mobility in the soil and preventing them from being taken up by plants. 
  • Helps to reduce chlorosis symptoms due to iron deficiency in plants by increasing iron uptake.  
  • Increases nitrogen uptake by plants 

Soil Biological Health: 

  • Increases the growth and activity of beneficial soil microorganisms by providing them a source of carbon and energy. This can lead to improved nutrient cycling and plant growth. 
  • Increases plant growth and productivity. 

Benefits of Humic Acid on Plant Growth 

  • Stimulates root growth and branching, allowing plants to better absorb nutrients and water from the soil. This can improve plant growth and overall plant health. 
  • Helps in increasing germination capacity of seeds. 
  • Stimulate the production of phytohormones and enzymes that can enhance plant growth by increasing resistance to stress, diseases, and pests.  
  • Helps in root formation and root respiration. 
  • Helps in photosynthesis by promoting the development of chlorophyll, amino acids and sugars. 
  • It helps in thickening of cell wall in fruits and thus improving their shelf life. 
  • Enhances the physical appearance and nutritional value of the produce. 
  • Act as a catalyst in many biological processes like nitrogen fixation and bioremediation. 
  • Increases crop yield and improves crop quality by improving plant health, nutrient uptake, and resistance to stress. 

How can we apply humic acid to plants?  

Humic acids are available in both liquid and granular form and hence can be applied using several methods including soil application, foliar application, seed treatment, and fertigation. 

  1. Soil Application:

Humic acid can be added to the soil in the form of granules, powders, or liquids. They can be mixed with soil before planting or applied as top dressing after planting. It can be applied to the soil by broadcasting, banding or drenching method. Soil application can improve soil structure, water holding capacity, nutrient availability and microbial activity. It is recommended to mix humic acid with water to ensure even distribution in the soil. 

  1. Foliar Application:

Humic acid can also be applied directly to the leaves of plants through foliar spraying.  Since humic acid is directly delivered to plant’s foliage in this method, it can be quickly absorbed and utilized by the plant. This can enhance nutrient uptake, photosynthesis, and plant growth. It is recommended to dilute the humic acid solution with water and apply it during early morning or late afternoon. This method is particularly useful for plants that experience nutrient deficiencies. 

  1. Seed treatment:

Seed treatment using humic acid can be done to seeds before sowing. Seed treatment can increase germination rate, seedling vigor, and early plant growth. It is recommended to soak the seeds in a solution containing humic acid and water for a few hours before planting. 

  1. Fertigation:

Humic acid can be dissolved in water and applied through irrigation water or drip system provide a continuous supply of nutrients and organic matter to the plants. Fertigation can improve nutrient use efficiency and reduce nutrient leaching. This method helps in even distribution of nutrients throughout the root zone of the plants.  

NOTE:

  • Water the soil after soil application of humic acid to help humic acid penetrate deeper into the soil. 
  • Avoid foliar application of humic acid during the middle of the day when the sun is at its peak. 
  • Humic acid can also be mixed with fertilizers and applied to the soil. But follow the recommended dose for both and mix them thoroughly before application to ensure even distribution. 

Time of Application 

The time of humic acid application may vary depending on several factors such as the crop type, growth stage, soil type, climatic conditions, and based on the need. However, it can be applied to plants at different stages of growth such as; 

  • Pre-planting to improve germination of seeds  
  • At the time of planting to promote early root development, improve nutrient uptake, and increase plant growth.  
  • During vegetative growth to avoid nutrient deficiencies by increasing nutrient intake and enhance plant growth and  
  • During flowering and fruiting stage, to improve fruit quality 

NOTE: The frequency of application may also depend on the specific product used. So please check the product’s description and label before use. Use only the recommended dosage. 

Boost your plant’s growth with any of these humic acid products 

Humic Acid Products  Method of Application  Dosage 
Multiplex Jivras  Drenching or  5 ml/lit water 
Foliar spray  3 – 4 ml/lit water 
Tapas Humic Acid with Special Minerals    Drenching  5 ml/lit water 


HUMETSU Humic Acid  Seed treatment  5 – 10 ml/kg of seed 
Soil drenching or  4 – 5 ml/lit water 
Foliar spray  2 – 2.5 ml/lit water 
Humesol Humic acid  Soil application  5 ml/lit water 
Foliar spray  2.5 ml/lit water 
V-Hume  Drenching   5 ml/lit water 
Hifield Organic Black Dragon Power Gel  Foliar spray or  1 – 1.5 gm/lit water 
Drip 
Hifield’s Humipro 12  Drenching or  1 – 2 ml/lit water 
Foliar spray or 
Drip 
Farmigo Humixol-L  Seed treatment  4 – 6 kg of seed 
Soil Application or  1 – 2 kg per acre (Mix with manures and apply) 
Drip  2.5 – 5 gm/lit water 
Anshul Humifest   Seed treatment  100 ml/lit water 
Urea treatment or  Mix 500-1000ml on 100 kg urea (Apply after 2 hrs of treatment) 
Fertigation or  7.5 ml/lit water 
Foliar spray  3 ml/lit water 

To find more products of humic acid click here 

Conclusion 

Humic acid is a mixture of various organic compounds providing numerous benefits for agriculture. It can improve soil quality, increase nutrient availability, enhance plant growth and boost crop yield. Its natural origin and environmentally friendly properties make it a great choice for sustainable agriculture.  The versatile applications of humic acid, combined with its ability to promote higher yields and reduce the need for synthetic fertilizers and pesticides, make it an indispensable asset for agriculture. Farmers and gardeners should consider incorporating humic acid into their farming practices to reap the benefits of this natural compound. 

Maize: Planting And Package Of Practices

0
Maize: Planting and Package of Practices

Maize (Zea mays L.) is one of the most adaptable crops, able to thrive in a wide range of agro-climatic conditions. Since it has the largest genetic yield potential of all the cereals, maize is referred to as the “Queen of cereals” worldwide. Although it is mostly used in India as a food crop by the rural populace in the form of bread and gruel, it also has enormous industrial potential. To ensure optimal yields and quality, it is essential to follow a well-defined package of practices of maize (POP), right from maize planting until harvest. Don’t stop here! Read further to know the complete guidelines on how to grow maize crop for successful harvest.

Maize Crop at a Glance 

Botanical Name: Zea mays 

Common Name: Corn (English), Makka (Hindi), Makka cholam (Tamil and Malayalam), Mokka jonna (Telugu). 

Crop Season: All seasons [Kharif and Rabi] 

Crop type: Field crop 

Soil Requirements 

Soils that are deep, fertile, abundant in organic matter and well-drained are the best for cultivation of maize crop. The soil should have a medium texture and should be capable of holding sufficient water. As the crop is mostly cultivated during the rainy season, it is particularly vulnerable to waterlogging. Hence, black clayey soils which hold excessive water are not suitable for maize cultivation in areas with heavy rainfall. Sandy loam soils with pH ranging between 6.5 to 7.5 are highly preferred for maize cultivation.  

Climatic Requirements 

From planting maize until emergence, the crop requires 9 to 30°C. With the increase in temperature and photoperiod, leaf number rises from emergence through silking. Time to tassel increases when the diurnal temperature ranges from 0 to 17°C. At 30°C, maize grows at its fastest pace. As long as there is no freezing temperature, the longer the grain filling period, the higher the grain yield. The rate of photosynthesis in maize will increase as the solar radiation level rises.  

Package of Practices for Maize 

Land preparation for Maize Cultivation 

For planting maize crop, prepare the field by ploughing the land 2-3 times with a mouldboard plough and forming the seedbed by ploughing the land twice and then crush the clods using a rotavator to bring the soil to fine tilth. Add FYM or compost at the rate of 10 t/acre during last ploughing and level the land. 

Seed rate and Spacing 

Type of Maize   Seed Rate (kg/ha)  Spacing (cm) 
Row to Row spacing  Plant to Plant spacing 
Grain  20  60  20 
Pop corn  12  60  20 
Sweet corn  8-10  75  25 
Baby corn  25-30  45  20 
Fodder maize  45-50  30  10 


Seed Treatment 

Before planting maize seeds, it is recommended to treat the seeds with Cyantraniliprole 19.8 %+Thiamethoxam 19.8% FS at a rate of 6 ml/kg of seeds to manage seed borne pests. 

Irrigation Schedule 

Due to the sensitivity of the maize crop to both moisture stress and excessive moisture, irrigation should be adjusted as needed. At the most crucial period (45 to 65 days after planting), make sure there is the maximum amount of moisture available; otherwise, the yield will be significantly decreased. Adjust irrigation as necessary for the crop’s subsequent development stage. The sixth leaf, late knee height stage, tasselling, fifty percent silking and dough phases are crucial. The most crucial stages are tasseling and silking, during which if subjected to water stress, lowers maize crop yield significantly. Ridges and Furrow method of irrigation is highly preferred for maize farm. 

Manures and Fertilizers 

During the last ploughing, 12.5 t/ha of FYM and 10 packets of 1 kg azospirillum should be applied. Further, NPK fertilizers should be applied as nearly as possible to the soil test’s recommendations. In the absence of soil test recommendations, use a general guideline of 120:60:60 kg/ha N:P2O5:K2O both during kharif and rabi. Apply a full dosage of P2O5 and K2O as well as 25% of the N dose just before maize planting/sowing or at the time of planting.  

Inter-cultivation Practices 

Weeding 

Weeds pose a severe threat to maize cultivation, with a potential to reduce production by up to 35%. It is believed that the most crucial time for weed competition in maize farm is the first 4 to 6 weeks following planting of maize. It is advised to inter-cultivate the soil between the rows using some animal drawn or mechanical implements which pushes the soil towards the plant base. Herbicide usage is quite efficient in keeping weeds at bay in maize field. Atrazine, pendimethalin or simazine pre-emergence applications at a rate of 1 kg/ha in 500 liters of water are often advised. Moreover, in case of post emergence recent herbicidal combinations like Mesotrione + Atrazine (2.27%+22.7% SC), Topramezone (33.6% SC) or tembotrione (34.4% SC) are very successful in controlling weeds of maize. 

Crop Protection (Pests and Diseases) 

Pests infesting Maize field 

a) Stem borer (Chilo partellus)

Symptoms 

A month after maize planting and up until the cobs appear, it infests the crop. The common damage sign is “dead heart” i.e., withering of the central shoot. On the stem, close to the nodes, are apparent bore holes. Juvenile larva feed on fragile, folded leaves by crawling over them, producing the familiar “shot hole” sign. 

Management 

  • Remove the weeds that act as an alternate host. 
  • Release Trichoderma chilonis eggs by placing 2 to 3 eggs per acre. 
  • Use of Chlorantraniliprole at 0.3 ml/lit water or Chlorantraniliprole 0.5% + Thiamethoxam 1% GR at the rate of 2.5 kg/acre along with 7 to 10 kg sand can be used when the severity of the infestation is more. 

b) Fall armyworm (Spodoptera frugiperda)

Symptoms 

  • Leaf tissue is first consumed by young larvae from one side. 
  • Larvae start to feed from the leaf edge inward by the second or third instar and start to develop holes in the leaves. This frequently results in a distinctive row of perforations in the leaves (shot holes). 
  • In extreme cases, larvae may tunnel through the ear of corn to munch on kernels.  

Management 

  • Egg masses and larvae should be hand-picked and destroyed by crushing or submerging in kerosene. 
  • Apply dry sand as soon as you notice the occurrence of fall army worm in the field to the whorl of the damaged maize plants.  
  • Male moths should be mass-trapped using fall army worm specific pheromone traps at a rate of 15 per acre. 
  • To stop fall armyworm larvae and lessen the likelihood that newly laid eggs will hatch, squirt 5% Neem seed kernel extract (NSKE) at a rate of 5 ml/lit of water. 
  • The following pesticides may be used up to early tasselling stage to control larvae in their second and third instars: Emamectin benzoate 5% SG or Chlorantraniliprole 18.5% SC or Tetraniliprole 18.18% SC. 
  • Seed treatment with Cyantraniliprole 19.8 %+Thiamethoxam 19.8% FS at the rate of 6 ml/kg seed also controls pests in initial days. 

Diseases affecting Maize field

a) Turcicum Leaf blight (Helminthosporium turcicum)

Symptoms 

  • Long elliptical greyish green or tan lesions on the leaves are characteristic of the disease. 
  • In the early stages, small yellowish round to oval spots are visible on the leaves. 
  • In the later stages, the spots gradually grow larger and are straw to greyish brown in colour in the centre with dark brown margins. 
  • Under conditions of extreme humidity, the entire leaf region becomes necrotic, giving the illusion that the plant is dead. 

Management 

Use potassic fertilizers while cutting back on the use of excessive nitrogenous fertilizers, there shouldn’t be any water stress. Under severe infection, spraying mancozeb at the rate of 0.2% or Avtar fungicide (Zineb 68% + Hexaconazole 4% WP) at the rate of 2.5 gm/lit water is recommended. 

b) Charcoal rot (Macrophomina phaseolina)

Symptoms 

  • Plants that are about to mature are frequently attacked by charcoal rot. 
  • In the roots, the fungus causes spores that are brown and water-soaked before turning black. 
  • As the plant ages, the infection spreads to the lower stem, where it causes grey streaks to appear on the stem surface of lower internodes, causing the crown to ripen prematurely, shatter, and break. 
  • Many black sclerotia on the vascular threads of split open stalks give the inside of the stalks a burnt look, which is a defining sign of the condition. 

Management 

  • Remove infected plant debris. 
  • Rotate crops often with plants that aren’t fungus’ natural hosts. 
  • Grow resistant varieties. 
  • Irrigate the crop at regular intervals from ear head emergence to maturity. 
  • Increase the dose of potassium application. 
  • Application of FYM enriched with Trichoderma viride during the last ploughing would reduce the intensity of disease.  
  • Under severe infestation, to manage the disease spray Nativo (Tebuconazole 50% + Trifloxystrobin 25% WG) at the rate of 0.6 gm/lit water or Amistor top (Azoxystrobin 18.2% + Difenoconazole 11.4% SC) at the rate of 1 ml/lit water. 

c) Sheath Blight (Rhizoctonia solani)

Symptoms 

  • The condition is characterized by broad, discoloured patches that alternate with erratic black bands. 
  • Pre-flowering is typically observed when disease first manifests. In addition, the stalk and the internodes split open in infected regions. 

Management 

d) Rust (Puccinia sorghi)

Symptoms 

  • Brown colour pustules are observed on the leaf surface. 
  • In severe infections, the whole leaf may wither completely presenting a scorched appearance to the field.  

Management 

  • Removal and destruction of alternate hosts (Oxalis corniculate). 
  • Spray Mancozeb 64% + Metalaxyl 8% WP at the rate of 1.5-2 gm/lit water or 300-400 gm/acre. 
  • In severe situations, apply Tilt (Propiconazole 25 % EC) at 200 ml/acre. 

e) Bacterial Stalk Rot (Erwinia chrysanthemi pv zeae)

Symptoms 

  • The condition is characterized by the development of soft rot on basal internodes giving a water-soaked appearance. 
  • An unpleasant odour usually accompanies such rotting.  
  • Leaves sometimes show signs of wilting and affected plants topple down.  

Management 

  • Soil should be drenched with bleaching powder containing 33% chlorine @ 10 kg/ha at pre-flowering stage. 
  • Spray Zineb 68% + Hexaconazole 4% at the rate of 2.5 gm/lit water or 500 gm/acre. 

Harvesting  

Maize can be harvested at physiological maturity i.e when the stalks and leaves are somewhat green, but the husk cover has dried and turned brown. In general stalks along with cobs are harvested and stacked. Further, dehusker-cum-sheller can be used for shelling of unhusked cobs. For better results maize should be shelled when the moisture ranges between 15 to 20%.   

Yield 

The feasible yield for the maize crop ranges from 20-25 qntl/acre since it has the best production potential among the grains. 

Varieties/Hybrids 

Hybrids  DHM-11, DHM-113, DPCH-6, Pioneer-3342 
Sweet corn  Madhuri, Priya, Win Orange 
Baby corn  VL-42, Him-123, Him-129 
QPM  Shakti-1, HQPM-1, HQPM-5 


Cotton Export Is Expected To Reach 40 Lakh Bales In 2022-23 While Jute And Mesta Production Is Rising

0
Cotton Export Is Expected To Reach 40 Lakh Bales In 2022-23 While Jute And Mesta Production Is Rising
  • In the response to the question of cotton export in Lok Sabha, Smt. Darshana Jardosh, Union Minister of State for Textiles gave a written reply stating – Cotton export may go to 40 lakh Bales in 2022-23. There may be variations depending on the availability, global demand and price parity of cotton. In India, Gujarat, Maharashtra and Telangana are the three states which together account for 65% of cotton production. 
  • Jute and Mesta which are paving their way through cotton exports are also found to rise. Below is the 5 years data related to Jute and Mesta production
Year 2018-19 2019-20 2020-21 2021-22 2022-23
Quantity (Lakh Bales) 72 68 60 90 95

(Source: Jute Advisory Board / Expert Committee on Jute)

To reach the expectations, Government of India implemented various strategies like

  • Continuation of Jute Packaging, Act of 1987. (Mandatory use of Jute in Packaging of Commodities)
  • For the improvement and boosting of the Jute Sector, implementing National Jute Development Program (NJDP)
  • Announcement of Minimum Support Price(MSP) for supporting raw jute-producing farmers. 
  • To prevent the farmer from fraudulent activities, Jute Corporation of India procures raw jute from them at MSP. 
  • The production capacity of jute mills has risen to 28 lakh bales from 26 lakh bales per year. This is due to the collection of foodgrains on a larger scale by the Government leading to the increase in demand for packing material. 

Potato: Planting And Package Of Practices

0
Potato: Planting & Package of Practices
Potato: Planting and Package of Practices

The potato is one of the world’s most widely grown and consumed crops, with China and India producing the most. Because of its nutritional value, it is a valuable food source for people all over the world. It is an ideal food source for the poor and working classes, who can now feed their families on a daily basis. The Irish potato famine is one of the most significant events in global agriculture history, particularly in terms of potato cultivation and consumption. A potato blight swept through Ireland between 1845 and 1849, destroying potato farms and spreading disease. They are high in a variety of vitamins and minerals, including vitamin C, potassium, vitamin B6 and iron. Potatoes are also high in resistant starch, gluten-free and have a low glycemic index, which may reduce the risk of colon cancer, celiac disease, and help to regulate blood sugar levels. The essential amino acids in this crop are leucine, tryptophane, and isoleucine. In this article, you will learn how to grow potato crops to increase your farms’s productivity. 

Potato Crop at a Glance 

Botanical Name: Solanum tuberosum L. 

Common Name: Potato, Ground apple, Tater, spud, tuber  

Local Names: Potato (English), Aaloo (Hindi), urulakkilangu (Tamil), Bangaladumpa (Telugu), Alu Gedde (Kannada), Batata (Gujarati) 

Crop Season: Rabi 

Crop type: Horticulture 

Soil Requirements 

Potato planting can be done in a wide range of soil, from loamy to sandy loam soils. Majority of these soil types are suitable for cultivation of potato crops, because this kind of soil has high organic matter with well-drainage and aerated. The ideal pH range is between 5.2 to 6.4. This crop cannot be grown in saline soils. 

Climatic Requirements 

For successful potato planting, maintaining the ideal temperature is crucial. The ideal temperature range for potatoes, during vegetative growth is 24 degrees Celsius and during tuber development is 20 degrees Celsius. If the temperature increases upto 30 degree Celsius then tuber formation is affected. The potato cultivation requires long sunshine days with cooler nights for reduced disease incidence.  

Package of Practices of Potato 

Seed Treatment  

Before planting, soak 100 kg tubers in 30g of carbon disulphide in 10 litres of water to break dormancy or soak 100 kg tubers in methoxy ethyl mercuric chloride at the rate of 50 g in 10 litres of water for two to five minutes.  

Seed Rate and Spacing  

The potato tubers are sown with a row to row spacing of 50 cm and plant to plant spacing of 20cm. In general, 600 to 800 kg tubers are required for the sowing of 1 acre land in  potato cultivation. 

True potato seed  

By using true potato seeds, the cost of seed tubers and the spread of diseases can be greatly reduced. HPS 1/13, HPS 11/13 and HPS 24/111 are varieties developed by the Central Potato Research Institute. Seedlings are transplanted 30 days after sowing and are raised in nursery beds like other vegetables. In potato planting, a volume of 100 gm seed is required to raise one hectare of crop. 

Main field preparation of Potato  

The potato farm should be well pulverized with one to two deep ploughing and two to four harrowing and ridges and furrows are formed with a spacing of 45cm between ridges. 

Irrigation Schedule 

The most popular method for irrigating potatoes is drip irrigation. The frequency of irrigation is influenced by the soil and climatic variables. Crops should be watered 7 to 10 days after planting. Water stress during the tuber formation stage will have a negative impact on production of crops. In general, the farmers who carry potato planting using ridges and furrow method irrigate the crop by supplying the water into the furrows directly.  

Manures and Fertilizers 

The recommended amount of manure and fertilizer for potato varies from state to state and relies on the varieties’ growth habits and production. In general, during last ploughing around 10 to 15 tonnes of FYM per acre should be applied to the potato farm. A basal dose of 40 kg urea, 150 kg SSP and 30 kg MOP is recommended to be applied during the last ploughing operation. Further, top dressing of urea at the rate of 40 kg/acre and 20 kg/acre are recommended to be applied at 30 and 50 DAS in potato cultivation. 

Intercultivation Practices 

Weeding 

In potato planting, weeding should be done on a regular basis to keep the field weed-free. Pre-emergence application of Sencor (Metribuzin 70% WP) at the rate of 250-300 gm/acre or post emergence application of Agil herbicide (Propaquizafop 10% EC) at the rate of 2 ml/lit water or 400 ml/acre were some excellent choices to control weed flush.  

Earthing up 

Earthing up should be done after thirty days of potato planting at least three to four times otherwise the colour of the potato turns into green which leads to poor quality of the potato. 

Crop Protection (Pests and Diseases) 

Pests 

a) Potato tuber moth (Phthorimaea operculella)

Symptoms

The larvae cause damage in the form of mines in the leaves and/or weakening of the stem, which can break. 

Management

  • Avoid planting potato tubers in shallow soil. Plant the tubers at a depth of 10 to 15 cm. 
  • Install pheromone traps 20/ha. 
  • To avoid potato tuber moth egg laying in exposed tubers, earth up 60 days after planting. 
  • Spray NSKE 5% or Quinalphos 20 EC 2 ml/lit (ETL 5% leaf damage) to control foliar damage. 
  • Store the tubers under 3cm thick sand. 
  • Apply Quinalphos dust to the seed tubers at a rate of 1 kg per 100 kg of tubers. 

b) Potato Cut worm (Agrotisypsilon)

Symptoms 

During the day, the cutworm larvae remain in the soil at the plant’s base. Some species cut down the stems of young potato plants at night, while others climb the plants and feed on their leaves. Old instar larvae can occasionally tunnel into potato stems, causing plant growth to be disrupted. Tubers near the ground surface may be damaged in such cases. A single larva can destroy several potato plants in a single night. 

Management

  • During the summer, set up a light trap to attract adult moths. 
  • Install a sprinkler irrigation system to potato farm and irrigate the field during the day to expose the larvae to bird predation. 
  • A day after planting, drench the collar region of the plants with chlorpyrifos 50% + cypermethrin 5% (BASF-ADEXAR) at the rate of 1ml/Lit of water. 

c) White Grub (Holotrichiasp)

 Symptoms

Bore holes are observed on the tuber. More than two holes are frequently found on a single tuber. Because white grubs do not enter and live inside tubers, these holes are not very deep. 

 Management

  • Summer ploughing to expose pupae and adults 
  • Install light traps and should be active between 7 p.m. to 9 p.m. 
  • During the months of July and August, handpick the third instar grub 
  • During the autumn season, apply Phorate 10G @ 25 kg/ha in endemic areas (August – October) 

 Diseases 

a) Late blight (Phytophthora infestans)

Symptoms 

They produce dark green, brown and black spots on the surface of potato leaves and stems, especially near the tips or edges where water or dew collects. On the lower surface of the foliage, spores appear white in colour. In the case of tuber blight, white mycelium can be seen on the surface of the tubers. 

Management

  • Remove any ground creepers that are a source of infection. 
  • Spray Mancozeb 2 gm/lit water or Chlorothalonil 2.5 gm/lit water at 45, 60, and 75 days after planting. 
  • Late blight resistant varieties such as Kufri Jyothi, Kufri Malar and Kufri Thangam should be grown. 

b) Early blight (Alternaria solani)

Symptoms

Affected leaves develop circular to angular dark brown lesions ranging in size from 0.12 to 0.16 inch (3-4 mm). Concentric rings frequently form in lesions, resulting in the characteristic target-board effect. Leaves that have been severely infected turn yellow and drop. Tubers that have been infected have a brown, corky dry rot. 

Management

Spray Difenoconazole 25% EC or Hexaconazole 5% EC  at the rate of 2ml per litre of water. 

c) Brown Rot (Ralstonia Solanacearum)

Symptoms

The first symptom is brown staining of the vascular ring (hence the name “brown” rot). The most characteristic symptom of brown rot in potato planting at the time of tuber formation is wilting. Bacteria ooze coming on the infected tuber surface and emit a foul odour.  

Management

  • Choose tubers that are free of the brown rot disease. 
  • Provide adequate drainage. 
  • Spray streptocycline sulphate 90% + Tetracycline hydrochloride 10% at the rate of 6 gm per 30 lit of water. 

Harvesting, Curing and Grading 

Harvesting is possible when the plants turn a yellow-brown colour and begin to dry. Care should be taken not to injure tubers when digging land for tuber harvesting. Irrigation should not be applied one week before harvest. Tubers should be air dried for 10-15 days after harvesting for curing. The process of curing is done in Potatoes properly by heaping them under shade in a ventilated area at around 15°C-20°C. To ensure uniform quality of superior grade tubers and to obtain remunerative returns, they must be graded according to their respective sizes. Potatoes are graded as seed size tubers, large size tubers and chats (potatoes smaller than seed size tubers). The seed size tubers should be separated and saved for seed, depending on their health standards. 

Yield 

The yield varies depending on the variety. However, the average yield of early-maturing varieties is around 20 t/ha, while late varieties yield around 30 t/ha. 

Varieties/Hybrids 

KufriAlankar, Kufri Anand, Kufri Ashoka, Kufri Badshah, KufriBahar, Kufri Chipsona-1, Kufri Chipsona-2, KufriSindhuri, Kufri Sutlej. 


Millets-Smart Nutritive Food Conclave Was Inaugurated By Union Minister Piyush Goyal In Delhi

0
Millets-Smart Nutritive Food Conclave Was Inaugurated By Union Minister Piyush Goyal In Delhi

An event titled “Millets-Smart Nutritive Food” was held in Delhi as a pre-launch event for “The International Year of Millets-2023” by APEDA (Agricultural and Processed Food Products Export Development Authority) to promote millet exports.

The Minister of Trade and Industry of the Union, Piyush Goyal, was the chief guest at the meeting. At the first millet conclave, it was decided that the e-catalogue on 21 millet-producing states in India and 30 potential importing countries will be released by the Government of India. A Knowledge book on Millets prepared in acquaintance with the Yes Bank (Knowledge partner) was released. In this conclave, to promote the exports of millets, the government has managed the participation of farmers, exporters and traders in BSMs (Buyer Seller Meets) and 16 international traders. 

Minister addressed to use ‘NOURISH’ as a call to action for millet’s promotion, in which-

  1. N stands for New Market and destination. 
  2. O stands for the promotion of ‘Organic Methods’ for millet cultivation to enhance its value and global acceptance rate. 
  3. U stands for protection and tagging ‘Unique varieties’ with GI tag.
  4. R stands for ‘Research on Millets’, expansion of the millets market by making them tastier and fast growing. 
  5. I stands for increasing ‘Involvement of Industry’ in the development of products, markets and value chains. 
  6. S stands for ‘Standards and Sustainability’ to get superior quality millets and its products. 
  7. H stands for High productivity and Home markets. 

Global Support

An opening ceremony for the International Year of Millets -2023 was launched by the FAO of the United Nations, in Rome, Italy. 70 nations across the world took part in this launch and in the UN’s resolution. Millets were among the first cultivated crops in India as per the evidence found in the Indus valley civilization. That’s why PM Modi’s vision of Vasidaiva Kutumbakam and this IYM 2023 celebration if merged together will help to promote India’s Nutri-cereal Millets globally and will place it in the world ‘Food Map’.