Home Blog Page 23

Paddy Crop: Planting And Package Of Practices

0
Calcium Plus: Enhance Soil Fertility and Crop Growth with the Power of Protein Hydrolysates.

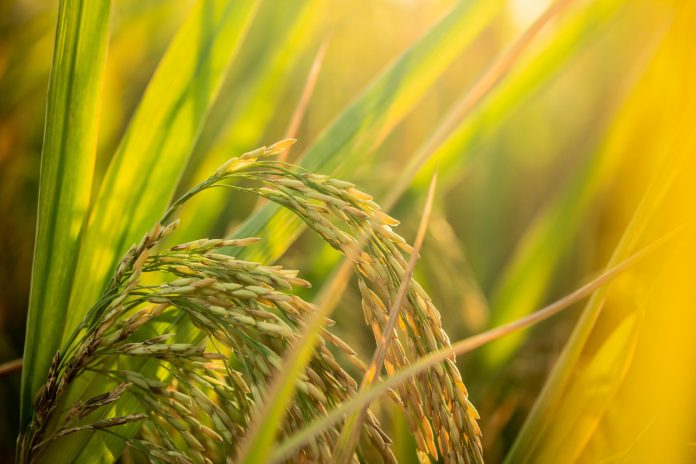
Paddy Crop: More than half of the world’s population consumes rice as their staple food.  Despite being grown in a variety of agro-climatic areas, rice is the most commonly used food in Southeast Asia. In India, rice planting is typically farmed in six distinct habitats, including coastal lowlands, deep water areas, rainfed lowlands, rainfed uplands, irrigated kharif and irrigated rabi. Gain a thorough understanding of how to grow paddy crops to boost your farm productivity. 

Rice Crop at a Glance 

Botanical Name: Oryza sativa 

Common Name: Rice (English), Dhaan (Hindi), Nel (Tamil), Nellu (Malayalam), Vari (Telugu). 

Crop Season: All seasons [Kharif, Rabi and Summer] 

Soil Requirements for Paddy Cultivation

Paddy planting can be done in a range of soil types, from sandy loams to clay soils. The best soil for the cultivation of rice crops is clay loams. Although rice crops can withstand a wide range of soil reactions, it may prefer acidic soils with a pH between 5.5 and 6.5. 

Climatic Requirements for Paddy Cultivation

For successful rice planting, maintaining the ideal temperature is crucial. Rice is best suited for areas with warm and humid climates. Paddy crop performs better at a temperature range of 21˚C to 38˚C and it can tolerate up to 40 ̊C. It is a short day plant and if long days appear at the reproductive phase it delays flowering. 

Package of Practices for Rice/Paddy Cultivation

Seedbed Preparation of Nursery 

  1. Dry seed bed 
  • Select suitable land near the water source in the middle of June and December for kharif and rabi crops, respectively. 
  • Plough the soil 3-4 times and use a rotavator after two ploughings for fine tilth and level properly. 
  • For a 1000m2 nursery area in rice planting, apply fertilizer at the rate of 10 kg N, 2kg P2O5 and 2kg K2O. 
  • About one-tenth of the main field is required as a nursery 

2. Wet Seed Bed 

  • Ploughing should be done 4 to 5 times till the desired tilth is obtained 
  • Divide the plot into sub-plots of 1m*10m size by making drainage channels on all four sides 
  • Apply 5kg urea, 10kg SSP and 5kg MOP before levelling per bed of 10m2 area 

3. Dapog Nursery 

  • Dapog method of raising nursery consists of growing seedlings on raised soil bed covered with polyethelene sheets. 
  • To establish a healthy paddy planting, sow pre-germinated seeds on top of the nursery cover, with a recommended rate of one kg per sq. meter. 
  • A nursery area of 25 to 35 sq.m. of the area is enough to raise seedlings for 1 hectare 
  • Seedlings raised by this method get ready for transplanting within 13 to 14 days 
  • In case of zinc deficiency, a 0.5% solution of zinc sulphate heptahydrate should be sprayed. 

Selection of Paddy Seed 

  • Prepare a salt solution (60 gm in 1-litre water) and place the seed in the container of salt solution 
  • The seeds that float upon soaking should be removed  
  • Dry the soaked seed under the shade 

Seed Rate of Paddy Crop

S.No.  Sowing method  Seed rate (kg/ha) 
1  Transplanting  30 to 35 
2  Direct seeding  75 
3  System of Rice Intensification (SRI)  7 to 8 

Seed Treatment in Paddy

Treat paddy seeds using Bavistin Fungicide (Carbendazim 50% WP) at the rate of 2 gm/kg seed for 24 hours to control seed-borne diseases. In the wet seed bed condition, this can be done at the time the seed is soaked for sprouting (or) soak the 10 kg seed in 20 litres of water containing Taqat Fungicide (Hexaconazole 5% + Captan 70% WP) at the rate of 2 gm/litre water to prevent from rice blast. 

Nursery Management 

  • After 24 hrs of seed soaking drain the water, and cover the seed in a gunny bag for germination 
  • Sow the sprouted seeds in the nursery bed and keep the beds moist for the first few days 
  • Maintain a shallow layer of water after seedlings are about 1 inch in height 

Main Field Preparation of Paddy/Rice

  • Prepare the land well by using a tractor-drawn plough in dry conditions. It can be done during pre-monsoon rain or immediately after the harvest of the second crop. This will reduce pest and weed incidence. 
  • Puddle the field twice at a 7-day interval and level the land after each puddling. Puddling is a process of churning the soil in standing water. This results in the formation of the impervious layer which reduces deep percolation losses. 
  • The system of rice intensification is the process of rice cultivation by adopting a square geometry. In this method of paddy cultivation, young seedlings of 8 to 12 days old (2-leaf stage) should be raised in moist soil (saturated)  

Age of seedlings for Transplanting

  • Kharif/ wet season: 20 to 25 days old seedlings 
  • Rabi/ Dry season/ Dalua: Maximum of 30 days old seedlings 

Spacing and Stand Establishment

  • Kharif/ wet season: 20 cm×10 cm 
  • Rabi/ Dry season/ Dalua: 15 cm×10 cm 
  • SRI: 25 cm × 25 cm  

Recommended Fertilizer Dose for Paddy Crop

  • Wet season: 80:40:40 N, P2O5 and K2O kg/ha + 10t/ha FYM  
  • Dry season: 120:60:60 N,P2O5 and K2O kg/ha + 10t/ha FYM 
  • For paddy planting in zinc-deficient areas, apply zinc sulphate at a rate of 25 kg/ha as a basal application. 

Irrigation water management 

  • Keep the rice farm under saturated condition for a week after transplanting for establishment and growth of roots 
  • Maintain a water level of 3 to 5 cm during the entire paddy crop growth period, after that field should be drained prior to top dressing and irrigated after 24 hours. 
  • In paddy cultivation, the most critical stages of water requirement are panicle initiation, flowering and grain filling stages. 
  • In general, rice crops require a 1200 mm depth of water during the crop growing season. 
  • Irrigation should be stopped in rice cultivation during the last 10 to 15 days before harvesting. 

Weed Management of Paddy Crop

During the initial 4 to 6 weeks of paddy planting, weed competition poses the greatest challenge for rice growth. Apply Craze (Pretilachlor 50% EC) at 500 ml/acre or NACL-Eraze Strong (Bensulfuron Methyl 0.6% + Pretilachlor 6% GR) at the rate of 4 kg/acre as pre-emergence to control weed emergence within 2 to 3 days of transplanting. At 20 and 40 DAS/DAT, post-emergence application of Nominee Gold (Bispyribac Sodium 10% SC) at the rate of 80 ml/acre is effective. The effectiveness of this application can further be improved by additional application of Almix (Metsulfuron methyl 10% + Chlorimuron ethyl 10% WP) at 8 gm/acre at 20 and 40 DAT. 

Paddy Crop Pests and Diseases

Read: 6 Paddy Pests You Need To Know About And How To Get Rid Of Them

Pests Infesting Paddy Crop, Its Symptoms & management

Pest  Symptoms  Management 
Yellow stem borer (Scirpophaga incertulas) 
  • Dead heart at a vegetative stage which turns brownish, curls and dries off 
  • White ears appear during the panicle emergence stage resulting in partially filled grains 
  • Apply Zygant (Flubendiamide 0.7% GR) at the rate of 5 kg/acre to the paddy farm 
  • Apply Ferterra (Chlorantraniliprole 0.4% GR) at the rate of 4 kg/acre to the rice farm 
Gall midge (Orseolia oryzae)  
  • Gall is a modified leaf sheath. If the crop gets infested during the early stages initiates heavy tillering 
  • Formation of hollow whitish to pale green cylindrical tubes in tillers known as gall/silver shoot/onion shoot 
  • Apply Ekalux (Quinolphos 25% EC) at the rate of 2 ml/lit water. 
  • Apply Curacron (Profenofos 50% EC) at the rate of 100 ml/acre  
Brown plant hopper (Nilaparvata lugens) 
  • The most characteristic symptom of BPH infestation in rice planting is the drying of crops in a circular fashion. 
  • Honeydew symptoms appear on the leaves 
  • Apply Flotis (Buprofezin 25% SC) at the rate of 2 ml/lit water 
  • Apply Prorin (Profenophos 40%+Cypermethrin 4%EC) at the rate of 400ml/acre 
Rice Hispa (Dicladispa armigera) 
  • Papery white rectangular streaks are the characteristic symptoms of infestation 
  • The tips of the infested leaf turn white 
  • Apply Lara 909 (Chloropyriphos 50% + Cypermethrin 5% EC) at the rate of 1.5 ml/lit water 
  • Apply Curacron (Profenofos 50% EC) at the rate of 100 ml/acre  
Rice leaf folder   (Cnaphalocrocis medinalis) 
  • The larva folds the leaf into a folder and knits it 
  • It stays within the leaf and feeds on it 
  • Faecal pellets are observed when the leaf is opened 
  • Apply Lara 909 (Chloropyriphos 50% + Cypermethrin 5% EC) at the rate of 1.5 ml/lit water 
  • Apply Curacron (Profenofos 50% EC) at the rate of 100 ml/acre  
Rice earhead bug (Leptocorisa acuta) 
  • During the milky stage both nymphs and adults suck the juice from grains 
  • The feeding site on the grain is marked as a brown spot 
  • Affected grains were partially filled or chaffy 
  • Apply Ampligo (Chlorantraniliprole 10% + Lambda Cyhalothrin 5% ZC) at the rate of 100 ml/acre  
  • Apply Coragen   (Chlorantraniliprole 18.5% SC) at the rate of 60 ml/acre  


Read: 11 Paddy Diseases: Understanding The Causes, Symptoms, And Treatment Options

Common Diseases affecting Paddy crop, Its Symptoms & Management

Disease  Symptoms  Management 
Rice blast (Pyricularia oryzae) 
  • Spindle-shaped brown spots with a greyish centre on the leaf sheath are a characteristic symptom of rice blast 
  • These spots join together, and the field shows a burnt appearance 
  • At times, rice planting may also experience blast, which occurs on nodes and peduncles, commonly referred to as node blast and neck blast, respectively. 
  • Apply Mantis 75 WP (Tricyclazole 75% WP) at the rate of 200 ml/acre 
  • Apply Custodia (Azoxystrobin 11% + Tebuconazole 18.3% w/w SC) at the rate of 300 ml/acre 
Brown Leaf Spot (Helminthosporium oryzae) 
  • Oval to circular brown spots appear on the leaf 
  • Later, these spots coalesce with one another and the leaf dries up 
  • Apply Amistar Top (Azoxystrobin 18.2% + Difenoconazole 11.4% SC) at the rate of 200 ml/acre 
  • Apply Contaf Fungicide (Hexaconazole 5 % EC) at the rate of 200 ml/acre 
Rice sheath blight (Rhizoctonia solani) 
  • Initially,  grey spots appear on the leaf sheath 
  • These spots enlarge and give a blackish-brown appearance 
  • Infected plants result in poor grain filling 
  • Apply Filia (Propiconazole – 10.7% + Tricyclazole – 34.2% SE) at the rate of 200 ml/acre 
  • Apply Zerox Fungicide (Propiconazole 25% EC) at the rate of 200 ml/acre 
False Smut (Ustilaginoidea virens) 
  • The spikelets are usually covered by greenish spore balls with a velvety appearance. 
  • The grain with a spore ball remains unfilled  
  • Apply Filia (Propiconazole – 10.7% + Tricyclazole – 34.2% SE at the rate of 200 ml/acre 
  • Apply Amistar top (Azoxystrobin 18.2% + Difenoconazole 11.4% SC) at the rate of 200 ml/acre 
Bacterial leaf blight (Xanthomonas oryzae) 
  • At the early stage, small water-soaked lesions appear on the leaves 
  • Further, they enlarge and turn the straw yellow with a wavy margin 
  • Apply Hal (Streptocycline Sulphate 90 % w/w, Tetracycline Hydrochloride  10 % w/w at the rate of 6 gm/50 litres water 
Bacterial leaf streak (Xanthomonas campestris p.v. oryzicola) 
  • At an early stage of rice planting, small water-soaked streaks may appear on the leaves 
  • Further, they enlarge length-wise and turn brown in colour 
  • Apply Hal (Streptocycline Sulphate 90% w/w, Tetracycline Hydrochloride  10 % w/w) at the rate of 6 gm/50 litres of water 

Harvesting and Threshing 

The most common sign of crop maturity is a change in straw colour from green to yellow. At this point, the panicle’s grain begins to mature from top to bottom. In general, the lower portion of the plant should still be green while harvesting to prevent shattering. If harvesting is performed by a combined harvester, threshing occurs simultaneously. However, if harvested manually, then the rice should be bundled and threshed using a thresher. 

Yield 

The yield of the paddy crop ranges from 4 to 5 t/ha depending on variety, soil and management conditions 

Varieties/Hybrids of Paddy 

  • Varieties: RNR 15048, Naveen, Pusa Basmati 1, Basmati 370, Lunishree, MTU 1010, Pusa 44 
  • Hybrids: PRH 10, DRRH 1, APHR 1, APHR 2, Pant Sankar, Mahyco 504, JK 6004 

Devastating Leaf Blight Of Wheat: The Integrated Management Approach 

0
Devastating Leaf Blight Of Wheat: The Integrated Management Approach 

Are you concerned about the health of your valuable wheat crops due to the threat of Wheat Leaf Blight? Don’t worry! This article is your go-to resource to learn crucial information and discover effective strategies to tackle this fungal menace.  

Alternaria triticina, a fungal plant pathogen, is responsible for inducing leaf blight in wheat plants. As wheat plants age, their susceptibility to this disease increases, as the fungal pathogen is unable to affect young wheat seedlings that are less than four weeks old. The symptoms caused by them are usually not evident until the plants are about seven weeks, but severe infection can cause up to 80% yield loss. Temperature of about 20-25 °C and high relative humidity favors the development of this disease.  

Type of infestation

Leaf blight of wheat has a complex disease cycle that involves primary and secondary infections. 

  • The primary mode of spread occurs by both external and internal seed borne conidia. 
  • The secondary infection mainly happens through the wind-borne conidia. 

Scientific Name: Alternaria triticina 

Symptoms of Wheat Leaf Blight

The following points will help you to easily identify the symptoms caused by leaf blight of wheat.  

  • Generally, the disease first appears in the field when the wheat plants are 7 to 8 weeks old.  
  • The lowermost leaves always show the first sign of infection, which gradually spreads to upper leaves.  
  • Reddish brown colored oval shaped spots develop on the young seedlings with bright yellow margin. 
  • When the infection becomes severe, multiple spots merge leading to leaf dryness. 
  • Heavily infected fields exhibit a scorched appearance that is noticeable even from a distance.  
  • Certain varieties experience a significant reduction in grain yield, up to 90%, if the infection occurs during or prior to boot leaf stage. 

Wheat Leaf Blight Control Measures

An integrated Pest Management measures includes cultural, mechanical, biological and chemical method which is often required to control leaf blight of wheat effectively. 

Cultural Measures

  • Grow resistant wheat varieties like Co 25, Sonalika, Arnautka, E6160 and K7340.  
  • Use only clean and disease-free seeds for planting. 
  • Avoid sowing wheat in infected fields for at least two years.  
  • Early planting can help avoid the peak period of wheat leaf blight infection. 
  • Proper nutrition management, including balanced fertilization and irrigation can also help to reduce the incidence of leaf blight disease in wheat. 

Mechanical Measures

  • Collect and burn the infected plants to reduce the spread the leaf blight disease. 

Wheat Leaf Blight Biological Measures

  • Anshul Tricomax Bio fungicide contains Trichoderma viridae which suppresses the growth of pathogens by producing antibiotics. The recommended dosage is 3 gm per liter of water. 
  • Mildown Bio fungicide contains Bacillus subtilis which competes with the disease-causing organisms and induces systemic acquired resistance against bacterial pathogens. For treating 1 kg of seed, mix 7.5 to 10 ml of mildown in 50 ml of water and apply them on seed for proper coating. Before sowing, shade dry the treated seeds for about 20-30 minutes. 
  • Amruth Almonas Bio Fungicide is a biological fungicide containing the cells of rhizobacteria and Pseudomonas fluorescence which exhibit antibiosis effects on disease causing pathogens. The recommended dosage for seed treatment is 3-5 ml per liter of water. 

Wheat Leaf Blight Chemical Measures

Chemical control is an important aspect of managing wheat leaf blight disease. Some of the commercial chemicals used for controlling leaf blight are mentioned in the table below, 

Product Name  Technical Content  Dosage 
Kavach Fungicide  Chlorothalonil 75% WP  1-2 gm/lit of water 
Ergon Fungicide  Kresoxim-methyl 44.3% SC  1-1.5 ml/lit of water 
Indofil Z 78 Fungicide  Zineb 75% WP  2-2.5 gm/lit of water 
Vespa Fungicide  Propiconazole 13.9% + Difenconazole 13.9% EC   0.75-1 ml/lit of water 
Bayer Buonos Fungicide  Tebuconazole 38.39% SC  1.25 ml/lit of water 
Dhanuka M45 Fungicide  Mancozeb 75% WP  3-4 gm/lit of water 
Blue Copper Fungicide  Copper Oxychloride 50% WP  1-2 gm/lit of water 


EXPLORE Effective Strategies For Managing Yellow Rust Disease In Wheat Crops

Management Of Ear Cockle In Wheat 

0
Management Of Ear Cockle In Wheat 

Are you familiar with the notorious ear cockle disease in wheat? Ear cockle disease is caused by the pesky nematode Anguina tritici, which can wreak havoc on your precious wheat crops. But fear not, our article will guide you to understand more about ear cockle disease including its management measures. Get ready to empower yourself and protect your wheat fields from this relentless nematode invader. 

Wheat gall nematode is known to be the first plant parasitic nematode, causing ear cockle disease in wheat and rye crops. This nematode also acts as a carrier of bacterial yellow slime ear rot (tundu disease) caused by Corynebacterium tritici. Cool and moist weather favors the development of wheat gall nematodes. 

Type of infestation

  • Primary infestation usually occurs through the infected seed. 
  • Secondary infestation is caused by the second larval stage of nematode, which remains inside the cockle (gall) to carry on the life cycle. 

Scientific Name: Anguina tritici 

Most Affected States

Ear Cockle disease is prevalent in almost all wheat growing regions of the country. But heavy infestation of this nematode has been reported in Punjab, Haryana, Uttar Pradesh, Bihar and Rajasthan. 

Symptoms of Wheat Ear Cockle

Below are a few signs which helps you to detect wheat gall nematodes infestation in your wheat fields, 

  • You can observe the symptoms of gall nematodes on leaves, stems and heads of the wheat plants. 
  • Wrinkled, rolled or twisted leaves can be seen. 
  • Affected plants may exhibit stunted growth.  
  • Infected heads are shorter and broader compared to healthy ones and retain their green color for an extended period. 
  • The presence of hard, dark-brown or black cockles or galls can be observed, which replaces grains either partially or entirely within the ear. 
  • The cockles remain filled with nematode larvae and when they are soaked in water, you can see larvae coming out from them. 

Control Measures

Follow the below listed management strategies to effectively prevent and control the wheat gall nematode infestations. 

Cultural Measures

  • Use certified or gall free seeds for planting. 
  • Sow seeds in uninfested soil to achieve healthy plant growth. 
  • Clean the contaminated seeds either by sieving or floating in water. 
  • Leave the land fallow for at least one year to eradicate nematode from the fields. 
  • Practice crop rotation with non-susceptible crops to reduce the buildup of soil inoculum. 
  • Putting the seeds in hot water at the temperature of 54-56°C for 10-12 minutes helps to kill nematodes. 

Biological Measures

  • PerfoNemat is residue free, nematode suppressor, based on the Dialdehyde mixture which has a contact-based curative action on nematodes. Drench Perfonemat at the rate of 2 ml per liter to effectively control wheat gall nematodes. 
  • Anand Dr Bacto’s Nemos is an ecofriendly biological nematicide containing Paceillomyces lilacinus, which is highly effective in controlling nematodes. For an acre, apply 2 litre of Nemos either by drip irrigation or soil application. 

Chemical Measures

  • There is no chemical solution available for controlling wheat gall nematodes. However, farmers can effectively manage nematode infestation by adopting cultural and biological measures. These measures, when carried out diligently, offer a reliable approach to mitigate nematode damage in wheat crops. 

Wheat: Planting And Package Of Practices

0
Wheat: Planting and Package of Practice

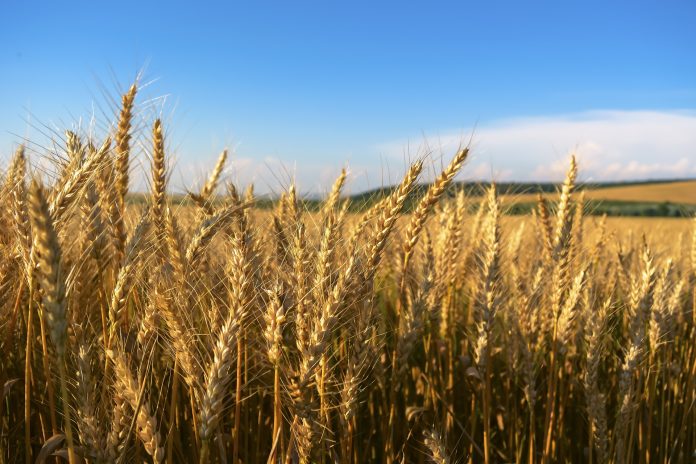
Wheat is a widely consumed staple food crop in the world. It is a cool season crop and preferred during the winter season in the tropics. It ranks first among all the food grains in terms of area and production while, in India it is a second important food crop next to rice. To ensure a successful wheat crop, it is essential to understand the process of wheat planting and techniques involved in growing a healthy and productive wheat crop.  

Wheat Crop at a Glance 

Botanical Name: Triticum aestivum L. 

Common Name: Gehu (Hindi), Kanaka (Punjabi), Kotumai (Tamil), Gothambu (Malayalam), Godhuma (Telugu). 

Crop Season:  Rabi season 

Crop type: Field crop 

Soil Requirements 

In general, wheat grows well in a wide range of soils especially in medium to heavy soils.  However, well drained loamy and clay loam are the most ideal textural classification for the cultivation of wheat crop.  

Climatic Requirements 

Wheat cultivation can be done in dry and chilled environmental conditions, and hence it is referred to as a winter season crop. For successful wheat planting, maintaining the ideal temperature is crucial. The temperature range from 16 to 21.1˚C and an annual rainfall between 750 to 1000 mm is suitable for optimum growth of wheat.  

Package of Practices for Wheat Cultivation 

Land Preparation  

The crop needs a seed bed that is clean, well-pulverized, fine and wet. If the wheat farm has less moisture than is necessary for this sort of tilth, pre-sowing irrigation should be provided. When working in an irrigated ecology, the first ploughing should be done with a soil-turning plough, and later three to four harrowing followed by planking. In rainfed regions, disc harrowing should be done after each productive rainfall during the monsoon and planking should always come after each harrowing to prevent clod development and moisture loss.  

When to grow Maize crop  

The optimum wheat planting time ranges between 1st fortnight of November to 1st fortnight of December. 

Seed rate and Spacing 

In general, wheat seeds should be sown in lines at a spacing of 22.5 cm × 10 cm with an optimum seed rate of 100 to 125 kg/ha. If sown late a seed rate of 125 to 140 kg/ha is recommended. About 20 to 25 days after planting wheat, thinning is required to maintain the ideal plant population. 

Seed Treatment 

Before cultivation of wheat, treat Shoot fly infestation can be controlled by treating the seeds with confidor super (Imidacloprid 30.5% SL) at the rate of 0.3 ml for 1 kg wheat seeds. Seed treatment with vitavax power (Carboxin 37.5% + Thiram 37.5% DS) at 3g/kg seed for 6 hours is recommended to prevent loose smut of wheat. 

Irrigation Schedule 

A wheat crop needs 300 to 400 mm of irrigation water. At critical periods, the crop is extremely vulnerable to water stress. The most critical stages for irrigation in wheat crop are Crown Root Initiation stage, Jointing, Heading and Dough Stage. 

Manures and Fertilizers 

To avoid unnecessary fertilizer application and boost profitability in wheat farm, the fertilizer should be administered based on the results of a soil test. Application of N, P and K at rates 120:60:40 kg/ha is recommended in irrigated environments. Apply half of the nitrogen as a basal dosage and the remaining half during the first irrigation at 30 to 45 days after sowing or planting wheat.  

Inter-cultivation Practices 

Hand weeding twice at 30 and 45 DAS is recommended for better weed control. In case of labour shortage, pre-emergence application of Stomp Xtra (Pendimethalin 38.7 % CS) at 600 ml/acre and post emergence application of Total Herbicide (Sulfosulfuron 75% + Metsulfuron 5% WG) at 16 gm/acre during 30 to 35 DAS can be recommended for efficient control of weeds in the wheat farm. 

Crop Protection (Pests and Diseases) 

Pests of wheat crop 

Pests  Scientific Name  Symptoms  Management 
Wheat Aphid  Macrosiphum miscanthi 
  • Both nymphs and adults suck the sap from wheat. 
  • Drying and wilting of shoots occur. 
  • Apply Confidor (Imidacloprid 17.8% SL) at 0.75 ml/lit of water. 
  • Apply Police (Fipronil 40% + Imidacloprid 40% WG) at 0.2 to 0.6 gm/litre water. 
Armyworm  Mythimna separata 
  • Leaf tissue is first consumed by young larvae from one side. 
  • Larvae start to feed from the leaf edge inward by the second or third instar and start to develop shot holes in the leaves. 
  • Apply Proclaim (Emamectin Benzonate 5% SG) at 80 gm/acre. 
  • Apply Plethora (Novaluron 5.25% + Emamectin benzoate 0.9% SC) at 1.5 ml/litre of water. 
Ghujhia Weevil  Tanymecus indicus 
  • Only adults of this insect cause damage. 
  • They feed on the shoot and cut the seedlings during initial stages of growth. 
  • Apply Proclaim (Emamectin Benzonate 5% SG) at 80 gm/acre. 
  • Apply Plethora (Novaluron 5.25% + Emamectin benzoate 0.9% SC) at 1.5ml/litre of water. 
Termites  Odontotermes obesus 
  • Termitariums were created. 
  • Plants dry off and easily pulled out when removed. 
  • Apply Miyogi (Chlorpyrifos 50% + Cypermethrin 5% EC) at 400ml/acre. 
Shoot fly  Atherigona soccata 
  • Dead hearts 
  • Decay of shoots 
  • Bushy appearance 
  • Apply Confidor super (Imidacloprid 30.5% SL) at 0.3 ml/lit of water. 
Pink Stem borer  Sesamia inferens 
  • Dead heart at vegetative stage which turns brownish, curls and dries off.   
  • White ears appear during flowering stage. 


  • Apply Zygant (Flubendiamide 0.7% GR) at the rate of 5 kg/acre. 
  • Apply Ferterra (Chlorantraniliprole 0.4% GR) at the rate of 4 kg/acre. 

Common diseases affecting wheat crop 

Disease  Causal Organism   Symptoms   Management  
Black or stem rust  Puccinia graminis tritici 
  • Rust like pustules appear on the stem. 
  • Later these pustules turn darker and black. 
  • Apply Amistar Top (Azoxystrobin 18.2% + Difenoconazole 11.4% SC) at the rate of 1 ml/lit of water. 
  • Apply Avancer Glow (Azoxystrobin 8.3%+ Mancozeb 66.7% WG) at the rate of 600 gm/acre. 
Yellow rust  Puccinia striformis 
  • Yellow coloured uredospores damage the interveinal regions. 
  • It gives a stripe like appearance. 
  • Apply Benmain (Carbendazim 50% DF) at 2 gm/lit of water. 
  • Apply Nativo (Tebuconazole + Trifloxystrobin 75% WG) at 0.6 ml/lit of water. 
Brown or orange rust  Puccinia recondite 
  • Orange coloured pustules appear on the leaf. 
  •  They are irregularly distributed. 
  • Apply Custodia (Azoxystrobin 11% + Tebuconazole 18.3% SC) at the rate of 1.5 ml/lit of water. 
Karnal bunt  Neovossia indica 
  • The affected plants give out a foul smell. 
  • The affected grains are usually covered with black sooty powder like substance. 
  • Apply Luna Experience (Fluopyram 17.7%+ Tebuconazole 17.7% SC) at the rate of 1 ml/lit of water. 
Loose smut  Ustilago nuda tritici 


  • Sooty black spores appear on the emerged ear heads. 
  • Wheat grains turn out to be sterile. 
  • Apply Conika (Kasugamycin 5% + Copper Oxychloride 45% WP) at 2 gm/lit of water. 


Harvesting and Threshing 

Crop has to be harvested using sickles when the crop turns completely yellow and left in the field to dry. Further, the grains are separated from the ear by threshing which is followed by winnowing and packing.  

Average yield from Wheat farm 

The yield of wheat usually ranges between 3 to 4 t/ha on average. 

Varieties/Hybrids  

DBW 222, PBW-502, HD 3385, HD 3226, DDW 47. 

Flag Smut Control: Best Management Practices For Wheat Farmers 

0
Flag Smut Control: Best Management Practices For Wheat Farmers 

Are you battling with wheat flag smut disease and searching for effective solutions to protect your crop and maximize your yield? Look no further! We have the solutions you’ve been looking for to directly tackle this destructive disease. Continue reading this article to gain a deeper understanding of wheat flag smut and find valuable insights to effectively combat its impact. 

Wheat flag smut, caused by fungal pathogen Urocystis tritici, poses a significant threat to global wheat production. Flag smut differs from other cereal smut diseases by exhibiting symptoms on the leaves rather than the heads. The yields of the affected plants can be reduced but incidence of this disease is low. This disease specifically targets wheat as its sole host, while other strains of the fungus affect various grass species. 

Type of Infestation

Flag Smut disease is both seed borne, and soil borne.  

  • Primary infection occurs by sowing infected seeds. 
  • Secondary infection occurs through the resting spores present in the soil.

Scientific Name: Urocystis tritici 

Most Affected States

Some of the most affected states of wheat flag smut includes Punjab, Haryana, Himachal Pradesh, Delhi, up, Bihar, Jharkhand and Madhya Pradesh. 

Symptoms of Wheat Flag Smut

Common symptoms caused by flag smut includes, 

  • Flag smut generally affects the wheat plants from late seedling stage to maturity stage. 
  • The leaves and leaf sheath are most commonly affected by the flag smut disease, but stem culm also gets affected occasionally. 
  • Grey to greyish black sori can be observed in the affected part of leaf blade and leaf sheath. 
  • Primarily the sori develops under the epidermis, later when the epidermis ruptures the black powdery mass exposes out from the leaves. 
  • In case of seedling infection, leaves exhibit a twisting and drooping appearance, eventually leading to withering. 
  • If the infection occurs during late stage, heads may fail to emerge or produce poor grain. 

Control Measures

If you find any of the above listed symptoms in wheat field, follow the integrated management measures which includes cultural, mechanical and chemical measures to effectively control flag smut disease. 

 Cultural Measures

  • Grow resistant wheat varieties like Pusa 44 and WG 377. 
  • Use only clean seeds for planting. 
  • Follow crop rotations with non-host crops like soybeans, sorghum and corn, to decrease the fungal population and reduce the risk of infection in future years. 
  • Avoid early planting, that too in warm moist soils, which are known to favor infection by the flag smut fungus. 

Mechanical Measures

  • Collect and burn the infected plants to reduce the spread of flag smut disease. 

Biological Measures

  • Ecoderma is a bio control agent containing Trichoderma viride, which protects crops from various seed and soil borne plant pathogens. To control flag smut disease, treat the wheat seeds with Trichoderma at the rate of 6 gm per kg of seeds. 

 Chemical Measures

  • Vitavax Power is a broad-spectrum dual action fungicide which controls seed and soil borne diseases and also acts as a plant growth stimulant. Its technical content Carboxin 37.5% + Thiram 37.5% DS. The recommended dosage for seed treatment is 3 gm per kg of seed.  
  • Treat the wheat seed with Carbendazim at the rate of 2 gm/kg of seeds to effectively control flag smut of wheat. 

Silicon: The Crop Nutrient You Can’t Ignore

0
Silicon: The Crop Nutrient You Can't Ignore

Imagine your crops thriving, standing tall and resilient, even in the face of strong winds. Picture them effortlessly fighting off pests and diseases, while adapting to drought and saline soils without skipping a beat.

Sounds like a dream, doesn’t it? Well, prepare to be amazed by the extraordinary power of a seemingly ordinary nutrient – Silicon. 

While we’re all familiar with nutrients like nitrogen and phosphorus, silicon has quietly been making waves as a significant nutrient for plants. Let’s dive into what makes silicon so special and why it matters for your crops.   

Importance of Silicon for Crops 

  • Silicon strengthens plant tissues and structures. When absorbed by plant roots, silicon is deposited in cell walls, forming a framework that provides rigidity and support 
  • This means that your plants become tougher, better equipped to withstand strong winds, heavy rain and even mechanical damage. 
  • It activates the plant’s immune responses, stimulating the production of defense compounds against pests and disease. This makes plants more resistant to pathogens and pests. 
  • Silicon aids in enhancing plant resilience to various abiotic stresses. It helps plants cope with conditions such as drought, high temperatures, and salinity.  
  • It also regulates water uptake, improving the plant’s ability to withstand water scarcity and maintain proper hydration. 
  • It facilitates the uptake and utilization of other essential nutrients within plants. It improves the absorption of nutrients like calcium, potassium, and phosphorus, optimizing their availability and utilization.  
  • When applied to root zone, it may reduce the toxicity of iron, aluminum and manganese. 

What are the sources of silicon for plants? 

Plants naturally absorb silicon through the weathering and erosion of soil minerals like silicates and clay minerals, which occur over time as rocks break down. 

Different ways by which we can add or incorporate silicon nutrient into soil include; 

  • Incorporating certain organic materials, such as rice husk, rice straw and sugarcane bagasse rich sources of silica into the soil.  
  • For example; Rice husk has an exceptional silica content of up to 28%, potentially the highest among all plant materials. When the dry matter of this plant is burned, the resulting ash contains silicon, which can be utilized as soil application. 
  • Depending on the source, irrigation water may cont ain dissolved silicon. If the water source is rich in silicon, it can contribute to the plant’s silicon uptake. 
  • Specialized silicon fertilizers are available. These products are designed to supply plants with a concentrated form of silicon.  
  • Certain beneficial microorganisms, like silicon-solubilizing bacteria can enhance silicon availability in the soil, facilitating plant uptake. 

Crops rich in Silicon 

Rice, Sugarcane, Bamboo, Maize, Barley, Wheat, Oats, Wheat.  

Unlock the power of silicon with ‘Geolife Tabsil’ for guaranteed strong plant growth! 

Geolife Tabsil – Ortho silicic acid (12%) 

  • Tabsil is available in effervescent tablets which makes it easy to apply to all types of crops. 
  • It is a non-toxic, residue free, and eco-friendly product. 
  • It is water soluble and hence it is easily absorbed by plants. 
  • Regular application of Tabsil provides plants with enhanced immunity, reducing the need for chemical sprays and promoting residue-free crop production. 
  • Crops recommended: All crops (Vegetables, flowers, cereals, pulses, fruits, spices and cotton) 

Application Details 

  • Broadcast (For Paddy Crop): Tabsil tablets (1 kg/acre) can be applied at 40-45 days after transplanting of paddy crop in the field with a water level maintained up to 7 cm. Keep the water for about five days after treatment. 
  • Foliar Application Schedule:  
Crop  Time of Application  Dosage  Application Method 
Maize, Wheat, and other cereals  After 40-45 DAS  1 gm/lit of water  Give 2-3 sprays at an interval of 15 days 
Cotton, Tomato, & Chilly  After 45 DAS or DAT  1 gm/lit of water  Give 4-5 sprays at an interval of 15 days 
Onion & other vegetables  After 45 DAS or DAT  1 gm/lit of water  Give 3-4 sprays at an interval of 15 days 
Cucurbits and Cole crops  After 45 DAS  1 gm/lit of water  Give 2-3 sprays at an interval of 15 days 
Grape, Pomegranate, and other Fruit crops  From 15 days before flowering  1 gm/lit of water  Give 3-4 sprays at an interval of 20-25 days 

(*DAS – Days after sowing; DAT – Days after transplanting) 

  • Drenching: Apply Tabsil (500 gm/acre or 2.5 ml/lit of water) through drenching at vegetative stage of crop. 
  • Drip Irrigation: Tabsil (500 gm/acre or 2.5 ml/lit of water) can be applied at vegetative stage of the crop with an interval of 30 days. 

NOTE: 

  1. Early application helps plants establish stronger cell walls from the beginning. 
  2. Splitting the applications also helps prevent excessive accumulation or leaching of silicon in the soil. 
  3. Applying silicon alongside nutrients like calcium and potassium can enhance their uptake and utilization by the crops. 
  4. Recommended to spray along with insecticide/fungicide to increase their performance. 
  5. Silicon wetting agents to be used along with pesticide/fungicide/growth promoters: Tapas silicon sticking & spreading agent, Stick N Spread, Shamrock Super Shot.   

Conclusion 

So, don’t overlook the power of silicon in plant nutrition. Embrace the power of this and witness the transformation in your crops. Let silicon be the secret weapon in your farming, fortifying your plants’ cell walls and making them stronger, more resistant, and ultimately more productive. 

From Symptoms To Solutions: Managing Downy Mildew In Cucurbit Crops For Optimal Yield

0
From Symptoms To Solutions: Managing Downy Mildew In Cucurbit Crops For Optimal Yield

Downy mildew is a common fungal disease that affects cucurbits, which include plants such as cucumbers, melons, gourds, pumpkins, and squash. It is caused by the pathogen Pseudoperonospora cubensis. This disease is highly destructive and can cause significant losses in yield if not managed properly.

We’re here to help you out to take necessary preventive measures, identify the signs of pathogen, find the conditions favorable for its growth to avoid it and to act quickly if the symptoms are detected.  

Symptoms of Downy Mildew in Cucurbits

Symptoms of Downy Mildew
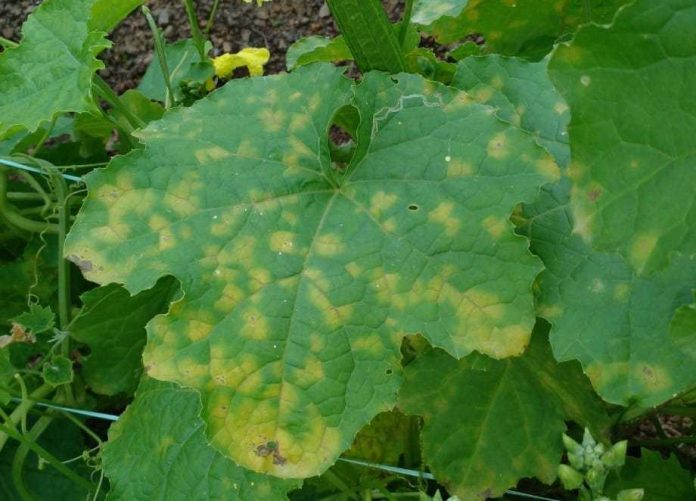
  • Appearance of small, angular yellow spots on the upper surface of the leaves.  
  • As the disease progresses, the yellow spots enlarge and turn brown. The lesions typically have angular edges, following the veins of the leaf. The affected areas may become dry and papery. 
  • During wet season or when the leaves are wet, water-soaked lesions can be seen on the underside of the leaves. Later, these lesions turn into fuzzy gray to purple mold-like fungus growth.  
  • The entire foliage may show signs of wilting.  
  • Infected plants may produce fewer fruits, and the ones that do develop may be smaller, misshapen, or have a poor flavor. 
  • Severe cases of downy mildew can lead to stunted growth of the plants. 

Understand the Ideal conditions for Downy mildew development and spread 

Downy mildew thrives under cool (15-20°C), wet and humid conditions. It spreads rapidly during periods of high humidity, such as rainy weather or heavy dew. The pathogen requires free moisture on the leaf surface for infection and development. 

It can survive in infected plant debris, seeds and soil, but it primarily spreads through airborne spores. These spores can travel long distances on the wind and infect healthy plants. The disease can also be introduced through infected seedlings or transplants. 

Preventive Measures for Downy Mildew in Cucurbits

  • Ensure to plant healthy seeds and transplants. 
  • For planting choose varieties that have resistance or tolerance to downy mildew like IRIS hybrid vegetable seeds F1 hybrid cucumber Janki, IRIS cucumber Dawat seeds, Sorot Ridge gourd, MH 38 Muskmelon seeds. 
  • Practice crop rotation with crops like legumes, tomato, brinjal and root crops for one or two growing seasons to disrupt the disease cycle and reduce the pathogen’s population in the soil. 
  • Promote good air circulation by adopting wide spacing between plants and pruning dense foliage to allow for better sunlight penetration and quicker leaf drying. 
  • Avoid overhead irrigation, as it creates leaf wetness favorable for pathogen development. Instead, use drip irrigation or hoses to water at the base of the plants, keeping the foliage dry. 
  • Remove and destroy any infected plant debris including fallen leaves, infected fruits, and any other plant residues. Properly clean tools and equipment to prevent the spread of the pathogen. 
  • Spray Neem oil for control of downy mildew. 
  • Apply protectant fungicide like 1% Bordeaux mixture or other copper-based fungicide or Mancozeb at 5 – 7 days interval as a prophylactic measure to prevent the disease incidence. 

Effective Management to Control the Disease 

Spray the chemicals at 7 – 14 days interval depending on the disease intensity and weather conditions. Bio-fungicides and some of the chemical fungicides such as Mancozeb and Copper oxychloride mentioned below can also be sprayed before the disease incidence as a preventive measure.  

Product name  Technical content  Dosage 
Biological Management 
Downy Raze  Botanical extracts  2.5 ml/lit of water 
Anand Dr Bacto’s Fluro Bio Fungicide  Pseudomonas fluorescens  2.5 ml/lit of water 


Chemical Management 
Cabrio Top Fungicide  Metiram 55% + Pyraclostrobin 5% WG  3 gm/lit of water 
Blitox Fungicide  Copper Oxychloride 50 % WP  2 gm/lit of water 
Zampro Fungicide  Ametoctradin 27% + Dimethomorph 20.27% SC  1.5 ml/lit of water 
Taqat Fungicide  Hexaconazole 5% + Captan 70% WP  2 gm/lit of water 
Ridomil Gold  Metalaxyl 4% + Manconzeb 64% WP  2 gm/lit of water 
Propi Fungicide  Propineb 70% WP  3 gm/lit of water 
Moximate Fungicide  Cymoxanil 8% + Mancozeb 64% WP  2 gm/lit of water 

Note:

  • Always read and follow the instructions provided on the product label, including application rates, timing and safety precautions. 
  • Alternate the products for spraying. 
  • Always prepare Bordeaux mixture fresh and use on the same day. 

Discover effective strategies for defeating Gummy Stem Blight in cucurbits. Learn more.

Protecting Crucifer Harvests: Effective Management Of Diamond Back Moth Larvae

0
Protecting Crucifer Harvests: Effective Management Of Diamond Back Moth Larvae

If you’re currently growing or have plans to cultivate cruciferous crops such as cabbage, broccoli, cauliflower and kale, we have vital information that demands your immediate attention. 

Have you heard about the diamondback moth? This tiny yet destructive creature has the power to destroy your entire yield if not managed effectively. Read on to discover the key insights that will safeguard your cruciferous crops from this pest, protect your investment and maximize your yield. 

Diamondback Moth Symptoms in Crucifers 

The larvae of the diamondback moth can cause damage to cruciferous plants through their feeding and mining activities. Look for the following symptoms that indicate their presence in the crops.  

  • Presence of whitish patches on leaves, as a result of the young larvae scraping (mining) the epidermal tissues. 
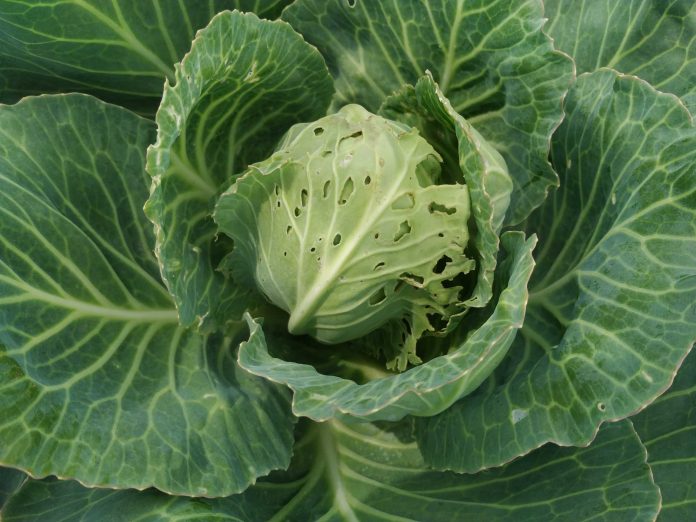
  • As the larvae progress to later instars, they primarily feed on the leaf surface, typically on the undersides of leaves, creating small, irregular holes. 
  • This gives the feeding site a window-like or shot-holes like appearance. 
  • The larvae feed the leaves voraciously and skeletonize the leaves by consuming the tissue between the leaf veins.  
  • Webbing or silk threads spun by the larvae for pupation can be observed on the undersides of leaves, leaf axils, or growing tips. 
  • Deformed or smaller heads in cabbage and other affected crucifers. 
  • Damage to the crowns or growing points of young plants, leading to growth stunting. 
  • Feeding on heart leaves before heading can affect flower production and yield in certain cruciferous crops. 
  • Presence of frass, i.e., excrement of the larvae on the leaves or often near the feeding sites.
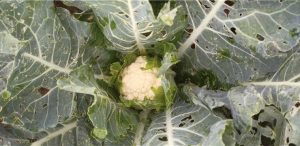
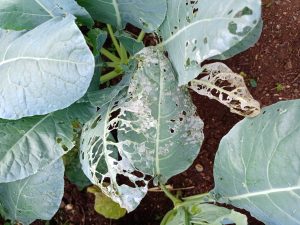
    Presence of window like or shot holes on the leaves
    Presence of window like or shot holes on the leaves

    Skeletonized leaves in infested cabbage leaves
    Skeletonized leaves in infested cabbage leaves

Diamondback Moth in Crucifers Preventive Measures 

  • Avoid planting cruciferous crops in the same area year after year. Rotate your crops with legumes, cucurbits, onion, garlic to disrupt the moth’s life cycle and reduce the buildup of infestations. 
  • Remove crop debris and weed hosts after harvest to eliminate overwintering sites and reduce the chance of reinfestation. 
  • Use mustard as a trap crop, by cultivating two rows of mustard for every 25 rows of cabbage. You can either sow the first mustard crop 15 days before planting the cabbage, or plant 20-day-old mustard seedlings simultaneously with the cabbage. 
  • Set up pheromone traps to monitor adult moth populations. 
  • Plant early in the season to reduce exposure to peak moth populations. 

Economic Threshold Level (ETL) 

Watch out for the diamondback moth. When you spot 20 larvae per 10 plants, it’s time to take action and protect your crucifers. 

Integrated Management of Diamondback Moth 

If necessary, use chemical insecticides labeled for diamondback moth control as a last resort. Follow all instructions and safety guidelines provided on the product’s label. 

Product name  Technical content  Dosage 
Mechanical Management 
Tapas Diamondback moth lure Trap  3 traps/acre 
Biological Management     
Delfin Bio Insecticide Bacillus thuringiensis var kurstaki  1 gm/lit of water 
Chemical Management 
Coragen Insecticide Chlorantraniliprole 18.5% SC  0.1 ml/lit of water 
Takumi Insecticide Flubendiamide 20% WG  0.5 gm/lit of water 
Keefun Insecticide Tolfenpyrad 15% EC  2 ml/lit of water 
Proclaim Insecticide Emamectin Benzonate 5%SG  0.5 gm/lit of water 
Godrej Gracia Insecticide Fluxametamide 10% EC  0.8 ml/lit of water 
Pegasus Insecticide Diafenthiuron 50% WP  0.5 – 1 gm/lit of water 

Get a detailed insights on the ways to prevent and control this destructive pest – Click here 

National Programme For Dairy Development (NPDD)

0
National Programme For Dairy Development (NPDD)

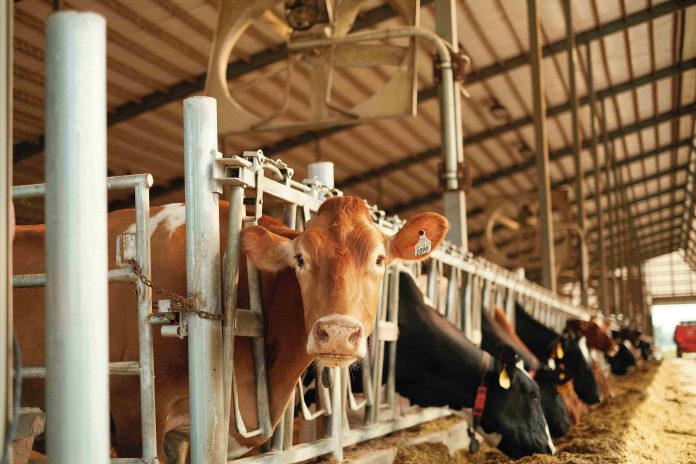
The National Programme for Dairy Development (NPDD) was launched in 2014, the Government of India to promote the development of the dairy sector and enhance the milk production of the country. The core objective of the scheme is to provide support for increasing the productivity of milch animals, promoting clean milk production and strengthening dairy cooperatives.

Scheme Overview

  • Scheme Name: National Programme for Dairy Development (NPDD)
  • Scheme Launch: The scheme was launched in 2014
  • Scheme Restructured: July 2021
  • Budget Allocated: Rs. 1790 crores
  • Implemented By: Department of Animal Husbandry and Dairying
  • Implemented Through: State Implementing Agency (SIA) – State Cooperative Dairy Federation
  • Type of Government Scheme: Central Government Scheme
  • Sponsored / Sector Scheme: Sector Scheme
  • Website: http://www.nddb.coop/, https://dahd.nic.in/ 

Objectives of National Programme for Dairy Development Scheme

  • To develop and enhance infrastructural facilities to produce high-quality milk, including the establishment of cold chain infrastructure that connects farmers to consumers.
  • To establish infrastructure for training dairy farmers and improve existing training facilities.
  • To strengthen dairy cooperative societies and producer companies at the village level.
  • To increase milk production in potentially viable milk federations and unions.

Features

The National Programme for Dairy Development (NPDD) provides various features and benefits to the farmers and dairy sector. The key features of the scheme can be addressed as:

Component “A” Component “B”
Focus on building and improving the infrastructure needed for the implementation of primary chilling facilities and quality milk testing equipment Dairy through Cooperatives (DTC)- provides financial assistance from the Japan International Cooperation Agency (JICA) for

  • Creation of necessary infrastructure
  • Provide market linkages for the produce in the village 
  • Strengthening of capacity building of stakeholding institutions from village to state level 

Benefits of the Scheme

The National Programme for Dairy Development (NPDD) provides various benefits to the farmers and dairy sector, some of which are listed below:

  • Increase the productivity of milch animals
  • Promotion of clean milk production
  • Strengthening of dairy cooperatives
  • Improvement in milk quality and quantity
  • Creation of employment opportunities
  • Increase in income of the farmers

Drawback

While the program has had many positive impacts, some drawbacks have been identified, including:

  • Limited coverage: The NPDD only covers a limited number of dairy farmers, leaving many farmers without access to the benefits of the scheme.
  • Lack of focus on small farmers: The scheme tends to focus on large-scale dairy farmers, neglecting the needs of small-scale farmers who form the majority of the dairy industry in India.
  • Lack of credit facilities: The NPDD does not provide adequate credit facilities to farmers, making it difficult for them to invest in their farms and improve their production.
  • Inadequate extension services: The scheme does not provide enough extension services to farmers, limiting their access to information on best practices and new technologies.
  • Inadequate price support: The NPDD does not provide adequate price support to farmers, making it difficult for them to earn a fair price for their milk.
  • Limited access to markets: Farmers often face limited access to markets, making it difficult for them to sell their milk and other dairy products.
  • Insufficient training: The scheme does not provide sufficient training to farmers, making it difficult for them to adopt new technologies and practices

How to Apply?

  • Step 1:  Visit the official website of the Department of Animal Husbandry and Dairying, Ministry of Agriculture and Farmers’ Welfare.
  • Step 2:   Download the application form for the NPDD scheme.
  • Step 3:   Fill in the application form with accurate and complete details.
  • Step 4:   Attach the required documents, such as your Aadhaar Card, PAN Card, and bank account details, with the application form.
  • Step 5:  Submit the application form with the attached documents to the designated authorities, such as the District Animal Husbandry Officer or the Dairy Development Officer.
  • Step 6:   The authorities will verify the application and documents and process the application further.
  • Step 7: If the application is approved, the subsidy or loan amount will be credited to the beneficiary’s bank account

Documents Required

The following documents are required for applying under the National Programme for Dairy Development (NPDD):

  • Identity Proof
  • Address Proof
  • Bank Account Details
  • Ownership Documents of Milch Animals

Conclusion

The National Programme for Dairy Development (NPDD) is a beneficial scheme for the dairy sector in India, providing support for increasing the productivity of milch animals and promoting clean milk production. The scheme has been successful in promoting the development of the dairy sector and improving the income of the farmers

Empowerment Of Women In Agriculture – Promotion Of Entrepreneurship For Women SHG

0
Empowerment of Women in Agriculture - Promotion of Entrepreneurship for Women SHG

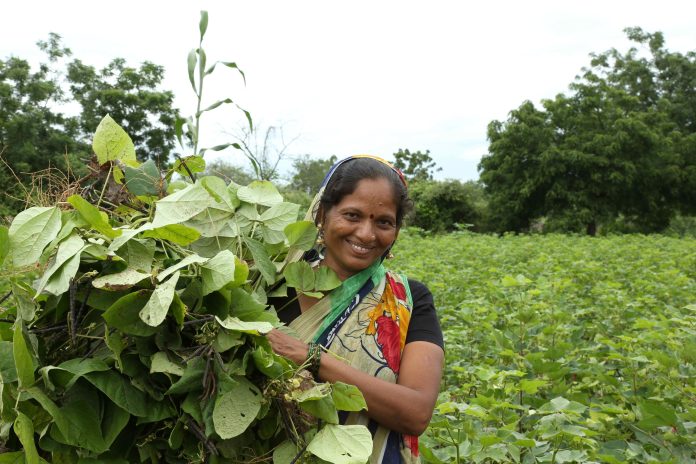
The government of Odisha has launched a scheme called “Promotion of Entrepreneurship for Women SHG,” which aims to empower women in agriculture and promote their entrepreneurship. This scheme mainly addresses the issue of the contribution of women in agriculture going unrecognized and undervalued.

The scheme has several benefits, including the empowerment of women in agriculture, the promotion of entrepreneurship, the creation of new employment opportunities, and the improvement of agricultural productivity and profitability. By empowering women in agriculture, the scheme can contribute to the overall development of the agricultural sector and the country as a whole.

Scheme Overview

  • Scheme Name: Empowerment of women in agriculture – Promotion of Entrepreneurship for Women SHG
  • Scheme Launch Year: 2022
  • Scheme Fund Allocated: Rs. 367.19 crores
  • Tenure: 2022-23 to 2026-27
  • Type of Government Scheme: Odisha State Government Scheme
  • Sponsored/Sector Scheme: State Sector Scheme

Objectives of the Scheme

  • To double the mushroom production across the State through area expansion involving women beneficiaries/Women SHGs
  • To make the state self-sufficient in the production of button mushrooms and loose flowers.
  • To ensure sustainable income generation of women beneficiaries/Women SHGs

Benefits

  1. Increase in Mushroom production: The scheme aims to double mushroom production across the state, which will lead to a significant increase in the availability of mushrooms in the market, meeting the growing demand. The increase in production will also boost the state’s economy by creating new job opportunities and increasing the income of farmers involved in mushroom cultivation.
  2. Empowerment of women beneficiaries/Women SHGs: By involving women beneficiaries/Women SHGs in the scheme, the scheme aims to empower them by providing them with training, skill development and a sustainable source of income. This will not only enhance the status of women in society but also contribute to the overall development of the state.
  3. Self-sufficiency in Mushroom Production: By making the state self-sufficient in the production of button mushrooms, the scheme aims to reduce the dependence on other states for the supply of mushrooms, thereby saving transportation costs and ensuring a consistent supply of high-quality mushrooms to consumers.
  4. Increase in income generation: The scheme aims to ensure sustainable income generation for women beneficiaries/Women SHGs involved in mushroom production. This will not only increase their income but also contribute to the overall economic development of the state by creating more employment opportunities and boosting local businesses.
  5. Environmental benefits: Mushroom production is an eco-friendly and sustainable farming practice that can help to reduce the carbon footprint of agriculture. By promoting mushroom production, the scheme can help to reduce deforestation, soil degradation and water pollution caused by conventional farming practices.

Empowerment of women in agriculture is crucial for the overall development of the agricultural sector and the country as a whole. Women play a significant role in agricultural production, processing, and marketing. The government of Odisha state has taken this initiative to empower women in agriculture which contribute to the holistic development of rural women and women’s employment.