Home Blog Page 25

Cotton Fields, No Weeds: Effective Weed Management Strategies For Cotton Farmers

0
cotton cultivation in india

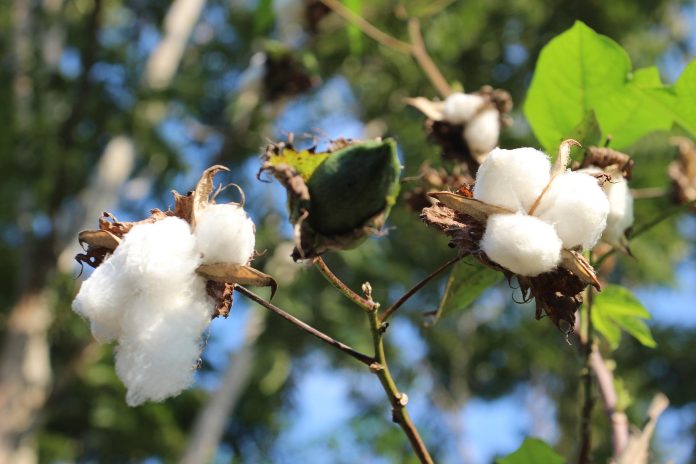
India depends significantly on cotton as a vital commercial crop. However, its slow growth in the initial growth stages and wider row spacing allows different weed species to grow and compete for water and nutrients, hindering cotton’s development and reducing crop yields. If the weeds are left unchecked, they could cause a yield loss of about 50 – 85%. To address this problem, effective weed management practices can be approached through integrated techniques including physical, mechanical, cultural, and chemical measures. 

Major Weeds in Cotton Field 

Weeds in cotton fields can be broadly classified into two main categories: grass weeds and broad-leaved weeds. Grass weeds typically have long, narrow leaves that are parallel-veined, while broad-leaved weeds have wider leaves that are often branchy-veined.  

Type of Weeds  Common weeds in cotton fields 
Grass weeds  Cynodon dactylon, Echinocloa crusgalli, Dactyloctenium aegypticum, Cyperus deformis, Cyperus rotundus, Dinebra retroflexa 
Broad-leaved weeds  Amaranthus viridis, Chenopodium album, Commelina benghalensis, Euphorbia hirta, Parthenium hysterophorus, Trianthema portulacastrum, Digera spp 

Preventive measures for weed management in cotton 

Cultural

  • Plough the land deeply during summer to uproot existing weeds. Expose the field to sun for at least 2 – 3 weeks. 
  • Grow short duration legumes such as cowpeas and lablab in between the wide-spaced cotton rows (inter-row cultivation) which can act as living mulch or cover crops to suppress weed growth and improve soil health. 
  • Use organic (paddy straw or dry leaves) or polyethylene mulch to suppress weed growth by blocking sunlight and reducing soil moisture. 
  • Follow crop rotation of cotton with non-host crops such as cereals or legumes to break the weed cycle. 
  • Follow other agronomic practices such as using ‘weed-seed free’ seeds, fertilizer and irrigation management.  
  • Plant the crop at the right time to take advantage of early season moisture and to minimize weed growth. 
  • Do timely hand weeding to keep the field weed free during initial days.  

Mechanical

Manual weeding using hoes or sickles is important to be carried out to reduce the weed population in the field. Do one hand weeding at 45 DAS, after application of pre-emergence herbicide. If no pre-emergence herbicide is applied at the time of sowing, give two hand weeding at 18 – 20 DAS and other at 45 DAS. Or you can run blade harrows at 20-25 DAS and 45-50 DAS in between the crop rows to remove the weeds. 

(*DAS – Days after sowing) 

Chemical Management with Herbicides 

Knowing the types of weeds, i.e., grass weed or broad-leaved weed present in cotton fields can help growers develop more effective weed management strategies tailored to the specific weeds present. 

Herbicides can be applied pre- or post-emergence to control weeds in cotton fields. Care should be taken to select the appropriate herbicide based on the weed species and crop stage. The critical period for weed control in cotton fields is the first 45 days. Use selective herbicides to target specific weeds while reducing the risk of harm to non-target species and the surrounding environment. 

  1. Pre-emergence Herbicides

Spray Pre-emergence herbicide Pendimethalin 30% EC at 1.2 liter per acre or 6 ml per liter of water, three days after sowing. It kills both grasses and broad-leaved weeds, thus protecting crops during early and critical days of their growth.   

  1. Post-emergence Herbicides

Time of ApplicationInter-row application at 15 – 30 DAS or at 2 – 4 leaf stage of weeds 

Product name  Technical content  Dosage  Type of weeds it controls 
Agil Herbicide  Propaquizafop 10% EC  2 ml/lit of water  Grass weeds 
Dozo Maxx  Pyrithiobac sodium 6% + Quizalofop ethyl 4% MEC  2 ml/lit of water  Both broad and narrow leaved weeds 
Targa Super or   Quizalofop Ethyl 5% EC  2 ml/lit of water  Grass weeds 
Ryusei Herbicide 
Hitweed Herbicide  Pyrithiobac sodium 10% E C  1 ml/liter of water  Broad leaved weeds 
Whip Super Herbicide  Fenoxaprop-p-ethyl 9.3 % EC    1.5 ml/lit of water  Grassy weeds 


IMPORTANT NOTE: 

  • Herbicides can effectively manage weeds in cotton; however, relying solely on chemical methods may not be enough for optimal weed control. To achieve effective results, cultural practices and regular hand weeding, in addition to herbicides, should be employed. 
  • Make sure the soil is moist at the time of spraying of both pre and post emergence herbicides. 
  • Do not spray if the rain is expected. 
  • To prevent weed resistance, it is advisable to rotate herbicide products with different chemicals. 
  • Post-emergence herbicide application is recommended at the 2-3 leaf stage of the weeds to obtain favorable results.  
  • Use sticking and spreading agent like Multiplex Nagastha – 180 (0.4 – 0.5 ml/lit of spray solution) for herbicide mix for increased efficiency of post emergence herbicides. 
  • Spraying should only be carried out on clear and sunny days. 
  • It is advisable to avoid spraying herbicides in the direction of the wind to prevent the herbicide from drifting. 
  • Follow the herbicide label instructions carefully, including the recommended rates, application timing, and safety precautions. 
  • Do not tank mix with sulphur and copper-containing pesticides. 

The Ultimate Guide On Chilli Cultivation: Steps For Successful Harvest

0
The Ultimate Guide on Chilli Cultivation: Steps for Successful Harvest

Are you tired of struggling with chilli cultivation and not getting the results you want? If so, you’re in the right place!

Our article on chilli cultivation practices is just what you need to take your crop to the next level! From choosing the right variety of chilli to preparing the soil, providing adequate water, controlling pests and diseases, and harvesting your chillies at the right time, this article covers it all! By following our step-by-step guide, you’ll be able to grow chillies that not only taste great but also contain essential vitamins and minerals. Imagine having a bountiful harvest of healthy, vibrant chillies that you can use in your cooking or sell at the market. So, if you’re ready to increase your farm yield with quality produce, make sure to read and follow these cultivation practices. You won’t be disappointed! 

Climate and Soil requirement 

For optimal growth, chilli plants thrive in both warm and humid climate, while dry weather conditions enhance fruit maturation. The ideal temperature range for its cultivation is between 20-25°C. Heavy rainfall can lead to poor fruit set, and when coupled with high humidity, it can cause the fruit to rot. Chilli plants cannot tolerate frost. An ideal soil type for chilli cultivation is a well-drained, loamy soil, rich in organic matter, and has a pH range of 6.5-7.5.  

Spice up your harvest with these BigHaat’s top-selling chilli seeds in every state!  

States  Most sold chilli seeds 
Andhra Pradesh  Armour F1 Hybrid, Yashaswini Chilli, HPH 5531 Chilli, Mahyco Capexx Chilli, US 341 Chilli, SARPAN – 102 Byadgi Chilli Seeds, Bangaram F1 Hybrid Chilli 
Telangana  US 341 Chilli, Yashaswini Chilli, Armour F1 Hybrid, Tejaswini Chilli, SVHA 2222 Chilli, HPH 5531 Chilli, Sitara Chilli 
Maharashtra  SARPAN – 102 Byadgi Chilli Seeds, US 1081 Chilli, Royal Bullet Chilli, HPH 5531 Chilli, Armour F1 Hybrid, US 341 Chilli, Sitara Gold Chilli 
Tamil Nadu  Bangaram F1 Hybrid Chilli, Royal Bullet Chilli, VNR 145 Chilli, Yashaswini Chilli, NS 1101 Chilli, Tejaswini Chilli, Indam 5 Chilli  
Madhya Pradesh  Armour F1 Hybrid, Navtej MHCP 319 Chilli, NS 1701 DG Chilli, NS 1101 Chilli, Rudra 101 F1 Chilli, US 730 Chilli, Sarpan F1-Sona 63 Chilli 
Karnataka  HPH 5531 Chilli, SARPAN – 102 Byadgi Chilli Seeds, HPH 2043 Chilli, Ulka F1 Chilli, Yashaswini Chilli, Armour F1 Hybrid 
Odisha  Royal Bullet Chilli, Armour F1 Hybrid, VNR 145 Chilli, NS 1701 DG Chilli, US 730 Chilli, Navtej MHCP 319 Chilli, Sarpan Hybrid Mahakali Chilli 

Don’t just plant any chilli seeds, choose the best from BigHaat! 

It is important to choose the right variety/hybrid of chilli based on your soil type, climate, and location. Select the variety that can adapt well to your local weather conditions. 

Top 8 Chilli Seeds  Features 
Armour Chilli F1 Hybrid Seeds 
  • Suitable for both fresh (green) and dry (red) purposes. 
  • High fruit pungency. 
  • Early maturing and high yielding. 
Royal Bullet Chilli Seeds 
  • It matures 10 – 12 days earlier than local variety. 
  • Fruit length is 4 – 5 cm. 
  • Used for fresh green fruits. 
  • Highly Pungent. 
HPH 5531 Chilli Seeds 
  • Dense bearing with medium green fruits. 
  • Can be used for both green and red fruits. 
  • Medium pungency and early maturing. 
  • Yield – 12 to 15 MT/acre in green fresh and 1.5 to 2 MT in Red dry (May depend upon season and cultural practices). 
NS 1101 Chilli Seeds 
  • Matures in 70 – 75 days. 
  • Can be used for both green (fresh) and red (dry). 
  • Very high pungency. 
  • Fruit length is 8 – 10 cm with medium thick pericarp. 
Sarpan 102 Byadgi Chilli 
  • Average Plant height is 90-100 cm. 
  • Fruit length is 15-18 cm. 
  • Suitable for irrigated and dry land farming. 
  • Suitable for dry chilli. 
  • Cherry red colour, highly wrinkled with acidic flavour. 
VNR 145 Green Chilli   
  • Early hybrid with short picking interval. 
  • Highly pungent; Suitable for green chilli. 
  • Parrot green colour fruits with smooth and shiny fruits. 
  • First Harvest – 50 to 55 days. 
  • Fruit length – 12 to 16 cm. 
Rudraksh 101 F1 Chilli Seeds 
  • Very highly pungent; Best for green chilli. 
  • Maturity – 65-70 Days; Length: 12-14 cm. 
  • Tolerant to fusarium & virus. 
  • Good for fresh market. 
Sarpan Chilli Bajji Seeds 


  • Attractive light green color, thick wall fruits, 12 – 15 cm long and have medium pungency. 
  • Suitable for fresh (green fruits) purpose (Bhajji / Pakoda). 
  • Fruits have very good shelf life. 

To find more chilli seeds click here 

Time of sowing 

Chilli can be sown during Jan – Feb, Jun – Jul and Sept – Oct. 

Seed rate for optimum yield 

Varieties – 400 gm/acre; Hybrids – 80 – 100 g/acre. 

Seed treatment 

Treat 1 kg of chilli seeds with 6 ml of Trichoderma viride  or 10 grams of Pseudomonas fluorescens before sowing to prevent damping off, collar rot, root rot and other seed borne diseases. 

Nursery Management 

If you want to increase your chances of a successful chilli crop, it’s important to know that chilli seedlings are typically grown in a nursery first and can be grown in either nursery beds or protrays before being transplanted to the main field. This can help ensure healthy growth and a higher yield. 

For raising seedlings for 1 acre field, you will need 40 m2 / 1 cent of nursery area. 

Nursery Raised Bed  Protrays 
  • Incorporate well decomposed FYM to pulverized soil. 
  • Prepare raised seedbeds of 1 m width, 15 cm height and of convenient length.  
  • Sow the treated seeds in lines spaced 5 cm apart and cover them with sand or well decomposed compost. 
  • Mulch the bed with paddy straw or green leaves after sowing.  
  • Water the bed every morning with rose can.  
  • Remove the mulch once the seeds have started germinating.  
  • Drench the nursery bed with copper oxychloride at 2 gm/lit water with 15 days interval to avoid damping off.  
  • Fill the protrays (98 cells) with sterilized coco peat. (Approx. 1.2 kg of cocopeat is required per protray) 
  • For 1 acre field, 120 protrays of 98 cells will be required to get 11,700 seedlings. 
  • Sow 1 treated seed per cell and cover it with coco peat 
  • You can notice germination in about 6 – 8 days. 
  • Water the seedlings daily using rose can. 
  • Drench with 5 gm/lit of 19:19:19, 18 days after sowing.  

(Note: Protrays can be maintained inside a green house or shade net house) 

Main Field Preparation 

Plough the soil 2 –3 times to get a fine tilth. Incorporate 10t of FYM to the soil during last ploughing. Apply 1 liter of Azospirillium and Phosphobacteria by mixing with 50 kg of well decomposed manure or cake. Prepare ridges and furrows at 60 cm spacing.  

Transplanting 

Your seedlings will be ready for transplanting after 30 – 40 days. Irrigate the furrows and then transplant 40 – 45 days old seedlings on the ridges. Plant seedlings of varieties spaced 60 cm between rows and 45 cm between plants, while hybrids spaced 75 cm between rows and 60 cm between plants.  

Intercultural Operations 

Nutrient Management 

Maximizing your chilli crop yield is all about proper fertilizer management. Choose the right type of fertilizer and apply it at the right time and in the right amount. The general dose of NPK recommendation for chilli crop is 48:24:16 kg/acre. Due to its lengthy growing season, it is important to apply manure and fertilizers carefully in split doses to ensure supply of nutrients at all growth stages. 

Nutrient  Fertilizer  Dosage per acre  Time of application 
Organic  FYM  10 t/acre  At the time of last ploughing 
Biofertilizer  Azospirillium  1 lit of product + 50 kg of FYM  At the time of ploughing 
Phosphobacteria  1 lit of product + 50 kg of FYM 
N  Urea  26 kg  Basal 
26 kg  30 DAT 
26 kg  60 DAT 
26 kg  90DAT 
P  Single Super Phosphate (SSP)  150 kg  Basal 
K  Potassium sulphate (SOP)  13 kg  Basal (SOP will improve chilli quality) 
13 kg  20 – 30 DAT 
B  Anshul Maxbor  1 gm/lit water  1st spray – Before flowering 

2nd spray – After 10 to 12 days interval 

Zn  Zinc micronutrient fertilizer  Foliar: 0.5 – 0.6 gm/lit water  3 sprays with 10 days interval from 40 DAT 
NPK + Mn  19:19:19 + Mn  Foliar: 1 gm/lit water  60 DAT 

(*DAT – Days after transplanting) 

Water Management 

Irrigate the field immediately after transplanting. You can subsequently irrigate once a week or 10 days depending upon the soil moisture condition and weather. Chilli plants are least tolerant to heavy moisture so, ensure that you water the plants only when required. The flowering and fruit development stages are considered critical periods for the plant’s water requirements.  

If you see plants showing wilting / drooping of leaves at mid-day, irrigate the field.  Chilli is normally cultivated under rainfed conditions, however irrigated chilli crops are also grown. If you are growing chilli under irrigated condition, adopt furrow or drip irrigation. Overhead irrigation can be avoided as it will promote disease development due to wetting of leaves. 

Earthing up and Mulching 

Perform earthing up, 30 days after transplanting. Then, use paddy straw or dried leaves for mulching. Mulches will help to conserve moisture and also reduce weed growth. 

Weed Management 

Spray Pendimethalin (600 – 700 ml/acre) as pre-emergence herbicide. Give two hand weeding, first within 20 – 25 DAT, after herbicide application while next after 20 – 25 days of 1st weeding to keep the field free from weeds.  

(Note: Follow product’s description or label for herbicide application) 

Intercropping 

If you’re additionally looking for ways to increase yield and profitability from your chilli field, ‘intercrops’ are the best solution. Intercrop chilli with coriander (1:3), onion (paired rows), or groundnut (3:1) to get higher net returns. It also helps to improve soil fertility and reduce pressure of pests and diseases. 

Use of Plant Growth Regulators (PGR) 

PGR product  Technical content  Dosage  Time of application 
Miracle Growth Regulator  

(Enhances vegetative growth, flower and fruit setting) 

Triacontanol EW 0.1 %   1 – 1.25 ml/lit water  25 DAT, 45DAT, 65 DAT* 
Planofix Alpha Growth Promoter  

(Prevents shedding of flower buds, increase fruit set and quality) 

Alpha Naphthyl Acetic Acid 4.5% SL    0.2 – 0.3 ml/lit water  1st spray: During flowering stage 

2nd spray: 20 – 30 days after 1st spray 

(*DAT – Days after transplanting) 

Plant Protection Practices 

Pests of Chilli crop 

Keep your chilli plants pest-free with proper pest management. 

Pest  Symptoms  Control Measures 
Fruit borer 
  • Larvae consume the internal content of the chilli fruit by making small holes and inserting their head inside while keeping the rest of their body outside. 
Tobacco caterpillar 
  • The caterpillars feed on the leaves, creating irregularly shaped holes in the foliage. 
  • After feeding, they leave behind only the veins and give the leaf a “skeletonized” appearance. 
Thrips 
  • They suck the sap from the leaf juices and causes crinkling and curling up of leaves.  
  • They lacerate the leaf surface and cause “Silvery or bronze appearance”. 
  • Affected flower buds become brittle and later drop down. 
Aphids 
  • Affected leaves may turn yellow or pale.  
  • They can become distorted or curled. 
  • Presence of black sooty mould due to honeydew secreted by them. 
Yellow muranai mite 
  • Downward curling and crinkling appearance of chilli leaves. 
  • Petiole of the infested leaves become elongated.  
  • Premature leaf drop. 
Root knot nematode 
  • Infected plants may show signs of yellowing of the leaves or chlorosis and wilting. 
  • Presence of small galls on the roots. 

Are thrips and mites causing trouble in your chilli field? Click here to learn more on how to get rid of them for good! 

Diseases affecting chilli plants 

Are your chilli plants showing signs of yellowing, wilting or stunted growth? These could be symptoms of a disease affecting your crops. Don’t panic, you can still save your harvest! Know the signs of disease early and take action to protect your crop and prevent further damage. Don’t wait until it’s too late.  

Disease  Symptoms  Control Measures 
Damping off 
  • Seedlings may die before or soon after emerging from the soil. 
  • Affected seedlings may wilt and collapse at the soil line. They may appear water-soaked or slimy. 
Anthracnose or Fruit rot 
  • Small, water-soaked lesions appear on the leaves, stems, or fruits of chilli plants.  
  • Branches show necrotic symptoms from tip downwards (dieback). 
  • Causes the fruit to rot and become discolored, with dark, sunken spots. 
Powdery mildew 
  • Presence of white or grayish powdery spots on the lower side of the leaves. 
  • Upper leaf surface may show yellow patches. 
  • Drying and shedding of leaves. 
Bacterial leaf spot 
  • The spots are usually small and angular with a yellow halo.   
  • In severe cases, leaves turn yellow and fall off. 
Cercospora leaf spot 
  • The spots are larger and round/oval with a tan to brown center and dark border. 
Fusarium wilt 
  • Yellowing and wilting of leaves. 
  • Leaves roll upwards and inward. 
  • Brown discoloration in the stem, and the internal tissues. 
Viral Diseases 

(Leaf curl, mosaic) 

  • Yellowing and curling of leaves. 
  • Presence of light and dark green mosaic patterns on the leaves 
  • Fruits may become misshapen or smaller in size. 

Control vectors (whitefly/Thrips/Aphids): 

Protect your chilli plants from viral infections – click here to know how! 

NOTE: Follow product’s label or description to know the right time of application. 

Harvesting 

The appropriate time to harvest chillies varies depending on the type and intended use of the crop. Chilli plants typically start flowering around two months after transplanting, and it takes about another month for the fruits to reach the green stage. If the chillies are intended for vegetable consumption, you can harvest them when they are still green. On the other hand, if the chillies are meant for drying, they can be left to fully ripen before harvesting. 

You can harvest the first yield when the fruits are green around 75 DAT. Subsequently, ripened red fruits can be harvested at 1–2 week intervals. The yield of green chillies will be 3 – 4 times higher than dry chillies. 

Yield 

  • Varieties: 4 – 6 t/acre (green chillies); 0.8 – 1 t/ha (dry pods) 
  • Hybrid: 10 t/ha (green chillies) 

Drying 

It is important to keep in mind that you preserve the red colour of the chilli fruits during the drying process. You can dry the chillies under the sun for a week or more, depending on the weather conditions. Turn the chillies regularly to ensure even drying and to prevent mold growth. Alternatively, you can also use a solar dryer or oven (8 hr at 60°C, then reducing it to 50°C) for drying if available.  

Sugarcane Internode Borer: Infestation And Its Management 

0
Sugarcane Internode Borer: Infestation And Its Management 

Sugarcane is an important cash crop in many tropical and subtropical regions of the world. However, the sugarcane internode borer is a significant pest that causes substantial economic losses to sugarcane farmers. The larvae of the sugarcane internode borer feed on the inner tissues of sugarcane stalks, leading to yield losses ranging from 20% in moderate infestation to 50% in severe infestation. In this article, we provide an overview of the sugarcane internode borer and explore various control strategies to help farmers minimize its damage. 

They are whitish larva with brown heads, which can be identified by the longitudinal stripes and dark spots on the dorsal side of the body. Waterlogged conditions around the shoot canes favor the buildup of sugarcane internode borer. Low temperature and high humidity also favor the outbreak of internode borers. 

Type of Infestation

The larvae of the sugarcane internode borer tunnel through the stem and feed on the cane horizontally causing damage to the cane by breaking them.  

Scientific Name: Chilo sacchariphagus indicus

Most Affected States Due to Sugarcane Internode Borer

Sugarcane internode borer is serious pest of sugarcane in many parts of India. But it is more severe in the states of Karnataka, Kerala, Uttar Pradesh and Tamil Nadu.  

Sugarcane Internode Borer Symptoms

  • Initially larvae feed on the young rolled leaves and cause shot hole in leaves. 
  • They also produce dead heart symptoms during the early stages of plant growth. 
  • The infested nodal region shows evidence of internodes being constricted and shortened, with multiple bore holes. 
  • Fresh excreta can be seen in the nodal region. 
  • Affected tissues turn red. 
  • When the infestation is severe, the plant stalks become weaker, leading to significant reduction in their growth. 

Control Measures

To manage the internode borer in sugarcane, it is often necessary to use a combination of various control measures. Here are some commonly utilized Integrated Pest Management practices to control internode borers. 

Sugarcane Internode Borer Cultural Measures

  • Choose setts that are free from pests for planting. 
  • Grow resistant varieties like CO 975, COJ 46 and CO 7304. 
  • Remove and destroy the weeds in and around the cane fields to reduce the internode borer population. 
  • Avoid using excessive doses of nitrogenous fertilizers. 
  • Detrash the canes and burn the trash to eliminate the larvae and pupae attached with the leaf-sheaths. 

Sugarcane Internode Borer Mechanical Measures 

  • Collect and destroy the eggs periodically. 
  • Set up pheromone traps at the rate of 4-5 traps per acre and change them once in 45 days to effectively trap internode borers. 

Biological Measures

  • Encourage bio control agents like egg parasitoid such as Trichogramma chilonis and larval parasitoids such as Stenobracon deesae, Apanteles flavipes to parasitize internode borer. 
  • Also release pupal parasitoids to control internode borers. 
  • Anand Dr. Bacto’s Brave is an eco-friendly bio insecticide containing Beauveria bassiana which acts on the cuticle of susceptible insects and kills them by producing toxins. The recommended dosage is 2.5 ml per liter of water. 

Sugarcane Internode Borer Chemical Measures

In cases where cultural, mechanical and biological control strategies are not sufficient to control sugarcane internode borer, adoption of chemical method of control may be necessary. Chemicals that can be used to control internode borer includes, 

  • Tafgor Insecticide is highly effective in controlling sugarcane internode borers. It belongs to the organophosphate group containing Dimethoate 30% EC. The recommended dosage is 1.5-2.5 ml per liter of water. 
  • Police Insecticide also helps to control internode borers in sugarcane. Its technical content is Fipronil 40% + Imidacloprid 40% WG. The recommended dosage is 0.2-0.6 gm per liter of water. 
  • Apply Furadan Insecticide, which contains carbofuran 3G granules on the soil at the rate of 12 kg per acre in case of severe infestation. 

Explore Battle Against Sugarcane Mealybug-Comprehensive Management Strategies For FarmersClick Here For More Information

Effective Management Of Sugarcane Leaf Hoppers 

0
Effective Management Of Sugarcane Leaf Hoppers 

Sugarcane Leaf Hoppers ,Attention Sugarcane Farmers! Are you worried about sugarcane leaf hoppers damaging your crops and causing significant reductions in your harvest? You’re not alone! Leaf hoppers are a major threat to the sugarcane industry in India, as it can cause a reduction of up to 31.6% in cane yield and 2-3% in sugar recovery if not properly managed. Hence it is essential for farmers like you to know how to manage them effectively. This article will provide you with effective strategies to safeguard your crops from sugarcane leaf hoppers and increase your yields.  

You can find them feeding gregariously on sugarcane plants and they jump off readily when disturbed. They pierce and suck the sap from plant tissues and mouthparts are usually hidden by their pointed snout. High temperature and humidity favor the rapid buildup of leaf hoppers. Heavy manuring and water logging also favor leaf hoppers multiplication. 

Type of Infestation

If leaf hopper infestation occurs during the rapid growth stage of the sugarcane plant, it can have a negative impact on the overall yield. On the other hand, if infestation occurs from September onwards, it can primarily affect the sucrose levels of the cane in the field.  

Scientific Name: Pyrilla perpusilla 

Most Affected States Due to Sugarcane Leaf Hoppers

The sugarcane leafhoppers are widespread throughout India and is known to be a major pest of sugarcane in several states, including Bihar, Haryana, Punjab, Uttar Pradesh and Madhya Pradesh. 

Symptoms of Sugarcane Leaf Hoppers

Below are the symptoms that can assist you in promptly detecting a leaf hopper infestation in your sugarcane fields, 

  • Both nymphs and adults suck the cell sap from the underside of the sugarcane leaves. 
  • As a result of sucking, leaves may become yellow and then dry. 
  • Hoppers excrete a sweet substance, called honey dew on to foliage, leading to the growth of saprophytic fungus known as black mould.  
  • Severe infestation may cause leaves to droop and hinder the overall growth of sugarcane plants. 

Control Measures

Do you see any of the above-mentioned symptoms in your fields? If so, why are you still waiting? Don’t wait any longer to take action. Implement an integrated pest management strategy to control the population of leaf hoppers and prevent further crop damage. Read on to know some effective measures to control sugarcane leaf hopper. 

Sugarcane Leaf Hoppers Cultural Measures

  • Avoid ratoon crop in areas prone to leaf hoppers.  
  • Detrash and destroy the older dried leaves to reduce infestation. 
  • Eliminate alternate hosts of pyrilla like maize, sorghum, barley etc. 
  • Avoid using excessive dozes of nitrogenous fertilizers, as this can lead to succulent growth which encourages leaf hopper population. 
  • Grow intercrops like ground nut and soybean to minimize leaf hopper damage. 

Physical Measures

  • Light Traps play a major role in trapping sugarcane leaf hoppers. Install Farmoguard Solar Light Trap in sugarcane fields at the rate of one per acre to attract and kill leaf hoppers. 

Mechanical Measures

  • Collect and destroy the egg masses of pyrilla to control their population. 
  • Install Tapas Yellow Sticky Trap in sugarcane fields to attract and trap leaf hoppers. For optimal trapping, set up 4 to 6 traps per acre. 

Sugarcane Leaf Hoppers Biological Measures

  • Encourage natural predators to control leaf hopper population. 
  • When 3-5 Pyrilla individuals are observed per leaf, release 3,200 to 4,000 cocoons or 3.2-4.0 lakh eggs of Epiricania melanoleuca per acre.  
  • Greenpeace Neemol Bio Neem Oil Insecticide contains neem-based products azadirachtin which when used at the rate of 1-2 ml per liter of water with 15 days interval between each spray can effectively control leaf hoppers in sugarcane fields. 
  • Anand Dr. Bacto’s Meta Insecticide contains a parasitic fungus Metarhizium anisopliae which can effectively control sugarcane leaf hoppers. The recommended dosage is 2ml per liter of water. 
  • Amruth Almax Liquid is a biological pesticide containing naturally occurring entomo pathogenic fungus Beauveria bassiana which comes in contact with the cuticle of the target insect and kills them. The recommended dosage is 2-3ml per liter of water. 

Sugarcane Leaf Hoppers Chemical Measures

If the sugarcane leaf hopper infestation becomes severe, it is necessary to take action to control their population. One effective method is to use commercial insecticides. Insecticides that can be used to control sugarcane leafhoppers are mentioned below, 

Product Name  Technical Content  Dosage 
Tafaban Insecticide  Chlorophyriphos 20 %EC  2.5 ml/lit of water 
Reeva 5 Insecticide  Lambda Cyhalothrin 5 % EC  2 ml/lit of water 
Tafgor Insecticide  Dimethoate 30% EC  1.5 ml/lit of water 
Anshul Ikon Insecticide  Acetamiprid 20% S.P.  0.5gm/lit water 
Actara Insecticide  Thiamethoxam 25 % WG  0.5 gm/lit of water 


Discover more : Fight Against Sugarcane Early Shoot Borer-Effective Management Strategies.

Sorghum Stink Bug: Symptoms And Solutions  

0
Sorghum Stink Bug: Symptoms And Solutions  

Sorghum stink bug is an important insect pest of sorghum and is commonly known as the green vegetable bug or green shield bug. The Sorghum stink bug is a polyphagous pest, which means it feeds on a wide range of plants other than sorghum, such as pulses, pearl millet, sunflower etc. They feed on all parts of the plants, but mainly cause damage to the developing grains. In this article, we will explore the impact of stink bugs on sorghum crops and management strategies for controlling their populations. 

The adult sorghum stink bug is a greenish brown insect with a shield-shaped body and has a characteristic triangular pattern on their body. Sorghum stink bugs are known for their unpleasant odor, which is emitted as a defense mechanism when they are disturbed or crushed. 

Type of Infestation

Sorghum stink bug infestation can be categorized into two types, viz. primary and secondary. Primary infestation occurs when the insect feeds on the plant during the vegetative stage, leading to stunted growth. Secondary infestation occurs when the insect feeds on the developing grains, causing the grains to shrink and deform.  

Scientific Name: Nezara viridula 

Most Affected States Due to Sorghum Stink Bug

Sorghum stink bug is a major pest of sorghum in many parts of India. Some of the states most affected by this pest include Maharashtra, Karnataka, Andhra Pradesh, Tamil Nadu, Gujarat and Rajasthan.  

Symptoms of Sorghum Stink Bug

Sorghum stink bug infestation can cause significant damage to the sorghum crop. Some of the symptoms of sorghum stink bug infestation are as follows:  

  • They feed on the leaves of sorghum plants, making rows of holes on leaves. 
  • Using their sucking type of mouthparts, they feed on the developing grain. 
  • As a result of sucking, shrinkage and black color discoloration of grains can be seen. 
  • Infested grains become ill filled or chaffy. 

Sorghum Stink Bug Control Measures

The following are the various cultural, physical, mechanical, biological and chemical measures that can be employed to effectively manage sorghum stink bug infestations. 

Cultural Control

  • Following crop rotation with non-host crops reduces the sorghum stink bugs population. 
  • Early planting decreases the likelihood of the flowering period coinciding with the peak activity of stink bugs.  
  • Proper nutrition management, including balanced fertilization and irrigation can also help to reduce the susceptibility of sorghum plants to stink bug attacks. 

Physical Measures

  • Installing Solar Light Traps in sorghum fields helps in trapping the stink bugs. For effective trapping install one light trap per acre. 

Mechanical Measures

  • Collect and destroy the heavily infested plants. 
  • Barrix Magic Sticker Trap Yellow Sheet attracts adult stink bugs and kills them. For an acre, use 10 sheets of sticky trap and place them above the plant foliage for effective trapping. 

Sorghum Stink Bug Biological Measures

  • Release natural enemies such as spiders and birds to prey on the sorghum stink bugs. 
  • Parasitic tachinid flies and wasps lay eggs into the eggs of stink bugs and their larvae feed on the hatching maggots, thereby reducing stink bug population. 
  • Ecotin Insecticide is a neem based biological insecticide containing Azadirachtin, which can be used effectively to control sorghum stink bugs. The recommended dosage is 0.4 – 0.7ml per liter of water. 

Sorghum Stink Bug Chemical Control

Commercial chemicals that can be used to control sorghum stink bug includes, 

Product Name  Technical Content  Dosage 
Karate Insecticide  Lambdacyhalothrin 5% EC  1.5 ml/lit of water 
Ekalux Insecticide  Quinalphos 25% EC  2 ml / lit of water 
Alika Insecticide  Thiamethoxam 12.6% + Lambda-cyhalothrin 9.5% ZC  0.5 ml/lit of water 
Profex Super Insecticide  Profenophos 40% + Cypermethrin 4% EC  2 ml/lit of water 
Asataf Insecticide  Acephate 75% SP  1.5 gm/lit of water 
Koranda Insecticide  Chlorpyrifos 50% + Cypermethrin 5% EC  2 ml/lit of water 


Sorghum Aphids: Damage And Its Integrated ManagementRead More

Sorghum Stem Borer: Effective Prevention And Management Strategies  

0
Sorghum Stem Borer: Effective Prevention And Management Strategies  

Sorghum is a highly valued crop for its adaptability to grow in a wide range of agro-climatic conditions. However, like other crops, sorghum is also susceptible to various pests that can cause significant damage to the crop and reduce yield. One such damaging pest of sorghum is the sorghum Stem Borer. It affects sorghum crops from seedling to maturity. Warm and humid conditions are particularly favorable for the stem borers. 

The life cycle of the sorghum stem borer includes four stages: egg, larva, pupa and adult. The female sorghum stem borer lays eggs on the surface of the sorghum stem. The eggs hatch into small, white larvae that burrow into the sorghum stem and feed on the inner tissue of the stem, causing damage to the plants. After feeding for several weeks, the larvae pupate inside the sorghum stem. 

Type of infestation

Sorghum Stem Borer infests the stem of the sorghum plant, by feeding the inner tissue of the stem and produces dead heart symptoms. Severe infestation leads to stunted growth and yield loss. 

Scientific Name: Chilo partellus  

Most affected states

The sorghum stem borer is a major pest in many states of India. The states that are most affected by the pest include Maharashtra, Karnataka, Andhra Pradesh, Telangana, Madhya Pradesh, and Gujarat.  

Symptoms of Sorghum Stem Borer

The sorghum stem borer infestation can be identified by the following symptoms:  

  • The borer attacks all parts of the sorghum plant except roots. 
  • Initially, larvae of sorghum stem borer feed on the upper surface of whorl leaves leaving the lower surface intact as transparent windows. 
  • Infested central shoot withers and produce “dead heart” symptom. 
  • Young larvae feed on the leaf sheath and leaf whorls causing pin holes or shot holes on the whorls of newly opened leaves. 
  • Older larva goes inside the stem by making a tunnel through the midrib and feed on the internal tissues. 
  • Bore holes can be seen on the stem, particularly near the nodes. 
  • As the infestation progresses, sorghum stem borer may also attack the peduncle. If both stem and peduncle are damaged, it can cause production of complete or partial chaffy panicles. Additionally, the affected peduncle may become weak and break. 

Sorghum Stem Borer Control Measures

The management of stem borer on sorghum plants can be achieved through an integrated approach that includes cultural, mechanical, biological and chemical measures. 

Sorghum Stem Borer Cultural Measures

  • Plant resistant cultivars like E 302, E 303, IS 2205 and ICSV 700 
  • Plough the stubbles during winter and burn them to destroy the hibernating larvae. 
  • Crop rotation can be followed with non-host crops. 
  • Avoid using excessive amount of nitrogenous fertilizers, as this can lead to succulent growth which encourages stem borer population. 
  • Grow intercrops like lab lab or dolichos in the ratio of 4:1 to minimise the stem borer damage. 

Physical Measures

  • Light Traps play a major role in trapping adult stem borers. Install Farmoguard Solar Light Trap in the sorghum fields at the rate of one per acre to attract and kill stem borer moths. 

Mechanical Measures

  • Remove and destroy the infested plant parts. 
  • Install Tapas Yellow Sticky Trap in sorghum fields to attract adult stem borer moths. For effective trapping install 4 to 6 traps per acre. 

Sorghum Stem Borer Biological Measures

  • Encourage bio control agents such as an egg parasitoid, Trichogramma chilonis and larval parasitoids, Bracon chinensis and Apanteles flavipes to reduce stem borer population. 
  • Release natural predators like earwigs and spiders to control sorghum stem borers. 
  • Ecotin Insecticide is a neem based biological insecticide containing Azadirachtin, which when used at the rate of 0.4 – 0.7ml per liter of water with 7 to 10 days interval between each spray can effectively control stem borer in sorghum plants. 
  • Amruth Almax Liquid (Bio Pesticide) contains the strains of naturally occuring entomo-pathogenic fungus Beauveria bassiana, which comes in contact with the cuticle of stem borer and colonizes them. The recommended dosage is 2-3ml per liter of water. 

Sorghum Stem Borer Chemical Measures

Sorghum leaf roller can be controlled by using commercial insecticides. Some of the commonly used insecticides for controlling leaf rollers are mentioned below, 

Product Name  Technical Content  Dosage  
Coragen Insecticide  Chlorantraniliprole 18.5% SC  0.4 ml/lit of water 
Alika Insecticide  Thiamethoxam 12.6% + Lambda-cyhalothrin 9.5% ZC  0.5 ml/lit of water 
Tafgor Insecticide  Dimethoate 30% EC  1.5 ml/lit of water 
Ekalux Insecticide  Quinalphos 25 % EC  2 ml/lit of water 
Reeva 5 Insecticide  Lambda Cyhalothrin 5 % EC  2 ml/lit of water 


 Managing Sorghum Shoot Bugs : A Comprehensive Guide to Crop Protection– See more

Combating Tuta absoluta, An Invasive Pest On Tomato Crop

0
Combating Tuta absoluta, an invasive pest on Tomato Crop

Tuta absoluta, commonly known as the American pinworm, is a significant pest of tomato plants. It poses a major threat to tomato crops due to its highly damaging nature throughout its life cycle. The impact of Tuta absoluta infestation on tomato crops can be severe, often resulting in substantial crop losses. Infestations by this pest can lead to yield losses ranging from 60 to 100%. Integrated pest management strategies involving the use of biological control agents, cultural practices and judicious pesticide application are crucial in managing Tuta absoluta infestations and minimizing crop losses.  

Host plants affected by the American Pinworm 

Tuta absoluta primarily infests tomato plants (main host). However, it is also known to attack other plants belonging to the Solanaceae family such as potato, brinjal, tobacco and peppers. 

How does it cause damage? 

  • The larvae of Tuta absoluta feed on the leaf tissue and mine into the leaf layers. 
  • They are characterized by irregular, necrotic ‘blotch – type’ mines in leaves. 
  • It burrows into the fruit making small pin head sized holes around fruit, hence it is referred as ‘Pinworm’. 
  • Severe infestation will lead to a decrease in photosynthetic activity making plants very weak and drying of infested plant parts. 
  • Fruits show puncture marks where the larva has entered on the fruit surface, with abnormal fruit shape and larvae exit holes.   
  • These holes may serve as secondary source for pathogen infection causing fruit rot. 
  • The presence of larvae, along with their frass (feces), can be observed inside the mines or tunnels on the leaves or in the damaged fruits.

    Presence of larva along with their frass
    Presence of larva along with their frass

Preventive Measures to Control Tuta Absoluta in Tomato

  • Rotate tomato crops with non-solanaceous crops like legumes, cabbage, cauliflower or leafy vegetables to disrupt the life cycle of Tuta absoluta. 
  • Remove and destroy infested leaves and fruits.  
  • Plough the field during summer months to expose and kill the pupae. 
  • Set up 8 – 10 Delta pheromone trap/water trap along with tapas pinworm pheromone lure per acre. 
  • Install 4 – 6 yellow sticky traps per acre to monitor the pest population. 
  • Spray Neem oil at 5 ml/lit of water every 10 – 12 days interval. 
  • Avoid growing tomato crops in close vicinity with alternate host crops. 

Tuta Absoluta in Tomato Chemical Management

Product name  Technical content  Dosage 
Benevia Insecticide  Cyantraniliprole 10.26% OD  2 ml/lit water 
Takumi Insecticide  Flubendiamide 20% WG  0.5 gm/lit water 
Lancer Gold Insecticide  Acephate 50 % + Imidacloprid 1.8 % SP  2 gm/lit water 
Sivanto Bayer Insecticide  Flupyradifurone 17.09% SL  2 ml/lit water 
Ekalux Insecticide  Quinalphos 25 % EC  2 ml/lit water 
Syngenta Voliam Targo  Chlorantraniliprole 4.3% + Abamectin 1.7% SC  1 ml/lit water 
Keefun Insecticide  Tolfenpyrad 15% EC  2 ml/lit water 

(Note: Use these chemicals judiciously and follow only the recommended dosage to avoid resurgence of the pest. Check the product’s label to know the right time of application)   

Read About Effective Methods to Control Tuta Absoluta in Tomatoes: Learn More

Sorghum Shoot Fly: An Integrated Pest Management Guide 

0
Sorghum Shoot Fly: An Integrated Pest Management Guide 

Sorghum Shoot Fly is a major pest that threatens the productivity of sorghum crops worldwide. It is considered to be one of the most important and destructive pests of sorghum. The insect, Atherigona soccata, infests sorghum plants during early growth stages, damaging the developing leaves and shoots. Infestation can lead to reduced yield and in severe cases complete crop failure can occur. This article will give complete information about causes, symptoms and management of sorghum shoot flies. 

They are small grey colored flies which are polyphagous in nature attacking various other gramineous crops. Because of high humidity and moderate temperature, late sown crops generally suffer from sorghum shoot fly damage. Cloudy weather favors the development of sorghum shoot flies.  

Type of Infestation

The maggot bores into the central shoots of the sorghum plant and produces typical dead heart symptoms. 

Scientific Name: Atherigona soccata  

Most Affected States Due to Sorghum Shoot Fly

Sorghum Shoot Fly is a major pest of sorghum crops in India. The pest is found in almost all the sorghum-growing states, but the major affected states are Maharashtra, Karnataka, Andhra Pradesh and Tamil Nadu.   

Symptoms of Sorghum Shoot Fly

The most common symptoms of sorghum shoot fly are: 

  • After hatching, the maggot moves towards the upper surface of the leaf and enters the area between the leaf sheath and stem. 
  • The maggot bores inside the stem and cuts the growing point. 
  • Infested central shoots become dry and produce “dead heart” symptoms. 
  • As a result of infestation, plants produce side tillers. 

Sorghum Shoot Fly Control Measures

Sorghum shoot flies are a common pest of sorghum and can cause significant damage if not managed effectively. To control these pests, an integrated approach that combines several management strategies is necessary.   

Sorghum Shoot Fly Cultural Meausres

  • Immediately after the harvest, plough the field and remove and dispose of the stubble. 
  • To reduce the incidence of shoot flies, sow sorghum immediately at the onset of monsoon rains. 
  • Rotate sorghum with non-susceptible crops. 
  • Grow resistant sorghum varieties like Co-1, CSH 15R, Maldandi, Hagari, Swati, CSH7, ICSV 705 etc. 
  • Use higher seed rate of 12.5 kg/ha and during thinning remove shoot fly damaged seedlings. Or else raise nursery and then transplant only healthy seedlings. 
  • Avoid the application of farmyard manure after the plant emergence to avoid the oviposition sites for female flies. 

Mechanical Measures

  • Pull out and destroy the plants that show dead heart symptoms at the time of thinning. 
  • Install plastic fishmeal trap at the rate of 12 traps per hectare until the crop reaches 30 days old.  

Biological Measures

  • Release natural enemies like parasitoids such as Trichogramma toideasimmonalsi, Trichogramma chilonis, Neotrichoporoides nyemitawus and predators such as spiders, coccinellids, lacewings etc to keep the shoot fly populations in check. 
  • Ecotin Insecticide is a neem based biological insecticide containing Azadirachtin, which can be used effectively to control shoot flies. The recommended dosage is 0.5 ml per liter of water. 

Sorghum Shoot Fly Chemical Measures

When the infestation is severe, chemical methods may be necessary. Some of the commonly used commercial chemicals for controlling sorghum stem borers are, 

Product Name  Technical Content  Dosage 
Seed Treatment 
Iffco Taiyo Plus Insecticide  Thiamethoxam 30% FS  10 ml/kg of seeds 
Shamrock CP Gold Insecticide  Chlorpyriphos 20% EC  3 – 4 ml/kg of seeds 
Gaucho Insecticide  Imidachloprid 48% FS  12 ml/kg of seeds 
Foliar Spray 
Tafgor Insecticide  Dimethoate 30% EC  1.5 – 2.5 ml/lit of water 
Ekalux Insecticide  Quinalphos 25% EC  2 ml/lit of water 


Managing Sorghum Shoot Bugs: A Comprehensive Guide to Crop Protection-Read more

Tackling Leaf Curl Virus: Strategies For Successful Management

0
Tackling Leaf Curl Virus: Strategies For Successful Management

Leaf curl disease can be a major concern for various crops, affecting their growth, yield and overall productivity. It is caused by group of viruses known as begomoviruses, transmitted by whiteflies. This article will provide you with a concise overview of leaf curl disease and practical management strategies to protect your crops. By understanding the disease’s symptoms, transmission and implementing preventive measures like crop rotation, sanitation practices and insect control, you can effectively manage and reduce the impact of leaf curl virus on your yields.  

How is it caused? 

  • The primary mode of transmission for leaf curl virus is through whiteflies (Bemisia tabaci). These tiny insects feed on infected plant sap, acquiring the virus and then transmit it to healthy plants as they move and feed on them.  
  • The virus can be introduced into a region through infected plant materials i.e., seedlings or saplings.  
  • Leaf curl disease tends to be more prevalent in regions with warm and tropical climates (25 – 30°C), as these conditions favor the growth and reproduction of both the virus and the whitefly vector.  
  • Some weeds and alternative plant hosts serve as reservoirs for the viral pathogen.  
  • Lack of crop rotation can increase the buildup and spread of the virus within a field or across neighboring fields. 

Host crops 

Leaf curl viruses affect a wide range of host crops including tomato, chilli, brinjal, cotton, tobacco, okra, papaya, and cucurbits. 

Leaf Curl Virus Symptoms:

Symptoms of leaf curl virus in chilli
  • The affected leaves exhibit an upward or downward curling along their edges, giving them a cupped or crinkled appearance.  
  • These leaves often become thick and leathery compared to healthy leaves. They may also appear stiff and brittle. 
  • They may show yellowing or chlorosis, particularly along the veins. 
  • Veins on infected leaves may appear thicker and enlarged. 
  • Infected plants may not produce flowers and fruits, or they produce fewer flowers and fruits that are small, misshapen, or of poor quality. 
  • Plants affected by virus show stunted growth, characterized by shortened internodes and significantly reduced leaf size. 

Preventive Measures 

Management of Leaf Curl Virus in Crops

There is no specific chemical control available to cure or control viral infections in plants. However, following the above-mentioned preventive measures, maintaining plant health and controlling vectors can significantly help to control leaf curl disease in plants.  

Prophylactic use of an organic viricide and micronutrient at early stages of crop growth may help to boost the plant’s natural defense mechanisms and enhance the resistance towards diseases.  

Product name  Technical content  Dosage 
Vanproz V-Bind or  Plant Extracts  2 – 3 ml/lit water 
VC-100  Organic compounds  5 gm/lit water 
Multiplex Magnum Mn or  Manganese 12%    0.5 gm/lit water 
General liquid Micronutrient  Multi Micronutrients  2.5 ml/lit water 


Management of Vector, Whitefly: 

Control the population of whiteflies by following a combination of mechanical+ biological + chemical management to help reduce the spread of the virus. 

Product name  Technical content  Dosage 
Mechanical Management 
T.Stanes Goal (Whitefly trap and lure)  Yellow sticky trap  12 traps per acre (moderate infestation) or 

15 traps per acre (heavy infestation) 

Biological Management 
Greenpeace Neemol Bio Neem Oil Insecticide  Neem Oil extracts (Azardiractin)  1 – 2 ml/lit water 
Nanobee Agrokill Insecticide  Nano Colloidal Micelles 100% (Fatty Acid based Plant Extracts)  3 ml/lit water 
Anand Dr Bacto’s Brave  Beauveria bassiana    2.5 ml/lit water 
Chemical Management 
Osheen Insecticide  Dinotefuran 20% SG  0.2 gm/lit water 
Tatamida SL Insecticide  Imidacloprid 17.8% SL  1 ml/lit water 
Oberon Insecticide  Spiromesifen 22.9% SC  0.3 ml/lit water 
Anant Insecticide  Thiamethoxam 25% WG  0.3 gm/lit water 
Benevia Insecticide  Cyantraniliprole 10.26% OD  1.5 ml/lit water 
Dhanpreet Insecticide  Acetamiprid 20% SP  0.2 gm/lit water 
Police Insecticide  Fipronil 40% + Imidacloprid 40% WG  0.3 gm/lit water 
Takaf Insecticide  Diafenthiuron 47% + Bifenthrin 9.4% SC  1.25 ml/lit water 

(NOTE: Follow product’s label to know the right time of application) 

Leaf Curl Confusions 

Leaf curl symptoms can indeed be confused with viral, fungal diseases, and physiological disorders. 

  • Fungal leaf curl diseases are caused by various pathogenic fungi, such as Taphrina spp., that infect plants and cause abnormal leaf curling symptoms. Presence of fungal structures, spores or visible fungal growth along with lesions or spots indicates fungal disease. 
  • Physiological leaf curl disorders, also known as non-infectious leaf curl, are not caused by pathogens but rather by environmental or physiological factors. These disorders often result from adverse growing conditions, nutrient imbalances, extreme temperatures or other stress factors.  

Read More: Effective Management of Leaf Curl Virus in Chilli Crops

Organic Farming: Promoting Healthier Soil, Food, And Environment

0
Organic Farming: Promoting Healthier Soil, Food, and Environment

Organic farming in India has witnessed a remarkable surge in recent years, positioning itself as an example of sustainable agricultural practices in the country. As concerns about food safety, environmental impact, and human health have grown, organic farming has emerged as a compelling alternative to conventional methods. The growing demand for organic produce, both within India and globally, presents a lucrative market opportunity. By transitioning to organic farming, you tap into this expanding market, potentially increasing your profitability and securing a sustainable future for your farm.  

Benefits of Organic Farming 

  • Organic farming practices promote soil health, reduce water pollution and preserve biodiversity.  
  • It focuses on building and maintaining healthy soil through practices like composting, crop rotation and cover cropping. This leads to improved soil fertility, structure and nutrient content.  
  • It prohibits the use of synthetic pesticides, herbicides, fertilizers and genetically modified organisms (GMOs). As a result, organic produce is free from harmful chemical residues, making it safer for consumption and reducing health risks. 
  • It provides habitats for a variety of beneficial insects, birds and wildlife, which helps maintain a balanced ecosystem and promotes natural pest control. 
  • It helps in conserving water resources and reducing soil erosion. 
  • Organic farming practices, such as using organic matter and cover crops help carbon sequestration in the soil and reduce greenhouse gas emissions which contribute to mitigating climate change. 
  • It promotes the preservation of indigenous seeds, traditional crop varieties and local farming knowledge, fostering agricultural diversity and cultural heritage. 
  • The increasing demand for organic products offers farmers an opportunity to tap into a growing market, command premium prices for their organic produce and potentially increase their profitability. 
  • Additionally, organic farming can reduce the input costs associated with chemical fertilizers and pesticides. 

Organic Certification Process 

Are you engaged in organic farming and seeking guidance on navigating the organic certification process? Here are the step-by-step instructions to help you through the certification process: 

Step 1: Familiarize Yourself with Organic Farming Practices 

  • Familiarize yourself with organic farming principles and practices, which include the avoidance of synthetic pesticides and fertilizers, use of organic inputs, crop rotation, composting and proper soil and water management. 

Step 2: Prepare your Farm for Organic Certification 

  • Start practicing organic farming methods for a specific period (minimum 5 years) and maintain records of your farming practices including inputs used, seed sourcing and pest and disease management. 

Step 3: Choose a Certification Body 

  • Research and select a recognized organic certification body accredited by the National Program for Organic Production (NPOP) or other authorized agencies.  
  • Consider factors such as credibility, cost and the certification body’s expertise in your specific agricultural sector. 

Step 4: Application Submission 

  • Contact the chosen certification body and submit an application for organic certification. 
  • Provide all necessary information, including farm details, crops or products to be certified and documentation of your organic farming practices. 

Step 5: Inspection and Documentation Review 

  • Once your application is received, the certification body will schedule an on-site inspection of your farm. 
  • During the inspection, the inspectors will assess your farm’s compliance with organic standards and review your documentation and records. 
  • Ensure that all necessary documents, such as land records, seed sourcing details and farm management plans, are readily available for inspection. 

Step 6: Compliance Assessment 

  • The certification body will evaluate the inspection findings and document review to determine if your farm meets the organic certification requirements. 

Step 7: Certification Decision 

  • Once the evaluation is complete, the certification body will inform you of their decision regarding organic certification. 
  • If your farm meets the required standards, you will be issued an organic certification certificate. 

Step 8: Compliance and Renewal 

  • After certification, continue practicing organic farming methods and maintain accurate records of your farming activities. 
  • Undergo regular inspections by the certification body to ensure ongoing compliance. 
  • Organic certification is typically valid for one to three years. Renew your certification by applying for recertification before the expiration date. 

Step 9: Labeling and Marketing 

  • Upon receiving organic certification, you can use the organic certification logo or label on your products. 
  • Market your organic produce by highlighting its certification status, emphasizing its health and environmental benefits. 

Major Components of Organic Farming 

  1. Green manure crops: Crops like sesbania, sunhemp and dhaincha are intentionally grown and then incorporated into the soil to improve soil fertility, structure and nutrient content. 
  2. Vermicomposting: It involves utilizing earthworms to break down organic waste materials such as kitchen scraps, crop residues, and animal manure into nutrient-rich compost. It is an organic fertilizer that enhances soil fertility and promotes plant growth. 
  3. Crop Rotation: It helps disrupt pest and disease cycles, prevents soil erosion, enhances soil health, and improves overall crop productivity. Example: green gram – wheat/maize, dhiancha – rice. 
  4. Biological Management: It involves the use of natural processes and organisms to manage pests, diseases, and weeds. Example: Using disease-resistant crop varieties, plant extracts, biocontrol agents, and managing crop rotations. 
  5. Animal husbandry: Raising livestock using organic methods, including providing access to organic feed, grazing in organic pastures, and avoiding the use of antibiotics and growth hormones. It promotes animal welfare and ensures the production of organic meat, milk, eggs, and other animal products. 
  6. Biofertilizers: They enhance nutrient availability, improve soil fertility and health, promote plant growth, suppress diseases and contribute to overall environmental sustainability. Examples: Rhizobium, Azotobacter, Azospirillum – fixes nitrogen in the soil; Mycorrhizal fungi – improves nutrient uptake, disease resistance & drought tolerance. 
  7. Manures: Utilizing organic manures, such as compost, farmyard manure, and other plant and animal-based materials, to enrich the soil with essential nutrients and improve microbial activity. 

Natural Pest and Disease Management 

Organic Practices  Examples 
Crop Rotation 
  • Crops having different susceptibility to pests and diseases can be rotated to help break the continuous cycle of pests, reduce disease pressure, and maintain soil fertility. 
  • Rotating tomatoes with legumes, such as beans or peas, as legumes fix nitrogen in the soil, improving soil health and reducing pests and diseases specific to tomatoes. 
Companion Planting 
  • Planting marigolds alongside tomatoes to repel pests like nematodes and whiteflies, 
Resistant varieties 
  • Planting disease-resistant varieties. Example: Urja Jhalri Supreme bitter gourd is resistant to powdery mildew, Ashoka Malgudi Beans is resistant to common, mosaic virus and halo blight. 
Biological Control 
  • Releasing ladybugs to control aphids, or Predatory mites to control spider mites. 
  • Applying Trichoderma spp., a beneficial fungus, to the soil to control soil-borne fungal pathogens. 
Traps and Barriers 
  • Using netting or covers to protect crops from birds or insects or installing yellow sticky traps to monitor and trap flying pests like whiteflies, aphids, and thrips. 
  • Cultivating trap crops like mustard in cabbage fields to control diamondback moth. 
Cultural Practices 
  • Pruning plants to improve air circulation, removing weeds that may harbor pests, practicing proper irrigation to prevent water stress and removing infected plant material to prevent disease susceptibility. 
Organic extracts 
  • Using neem oil as a natural insecticide. 
  • Applying Bacillus thuringiensis (Bt), a microbial insecticide, to target specific caterpillar pests. 
  • Garlic extracts can repel and kill various insect pests, such as aphids, caterpillars, and beetles. 
  • Buttermilk can be used against fungal diseases. 
  • Cow milk helps to control leaf spot diseases. 
  • Using panchagavya, dasagavya and mineral oils can help to control certain pests and diseases. 


Organic Marketing and Market Opportunities 

Organic marketing in India is experiencing significant growth due to increasing consumer demand for organic products and a rising awareness of the benefits of organic farming. The market for organic products is expanding rapidly, offering ample opportunities for organic farmers and producers. Large retail chains, specialty organic stores, and online platforms are actively promoting and selling organic products to meet the increasing consumer demand. Indian Government also facilitates market access for organic products. e-NAM allows organic farmers to sell their produce directly to buyers, eliminating intermediaries and ensuring fair prices. 

Government Initiatives and Support 

The Indian government provides support through schemes, financial assistance, training programs, and initiatives to promote organic farming and its adoption across the country. Here are some of the initiatives; 

  • Paramparagat Krishi Vikas Yojana (PKVY) encourages farmers to adopt organic farming methods on a large scale by providing them with financial and technical support. 
  • Mission Organic Value Chain Development for North-Eastern Region (MOVCDNER) aims to encourage farmers in the Northeast region to adopt organic farming practices and support them in obtaining organic certification for their farms. 
  • Capital Investment Subsidy Scheme (CISS) for commercial production units of organic inputs. 
  • The National Mission for Sustainable Agriculture (NMSA) provides financial support for organic farming projects, capacity building, organic input distribution, and market linkages. 
  • Mission for Integrated Development of Horticulture (MIDH) provides financial assistance for adopting organic farming, establishing vermicompost units, and procurement of organic inputs. 
  • Rashtriya Krishi Vikas Yojana (RKVY) supports various agricultural initiatives, including organic farming. It provides financial assistance to states for implementing organic farming projects, organizing training programs, and promoting organic input distribution. 
  • Pradhan Mantri Krishi Sinchayee Yojana (PMKSY): While not specific to organic farming, PMKSY includes provisions for water conservation and efficient irrigation practices, which are vital for sustainable and organic agriculture. 

Challenges and Solutions in Organic Farming 

  • The transition from conventional to organic farming can be financially challenging as farmers may experience lower yields and need time to build soil health. Seeking financial support through government schemes may help farmers during this period. 
  • Organic farming requires specialized knowledge and skills. Farmers may face challenges in acquiring the necessary training and expertise. Attending workshops, training programs, and seeking guidance from experienced organic farmers or agricultural extension services may help to solve this problem. 
  • Organic farmers often face challenges in accessing markets and obtaining fair prices for their produce. Building a strong network with organic retailers, participating in farmers’ markets, joining organic farmers’ associations or cooperatives, and leveraging digital platforms for direct sales may tackle this challenge.